
Please complete all previous assignment before starting this assignment.
The following tasks are to acquaint yourself with the Modular synthesizer. You're essentially going to be re-doing what we did in class. For each step, make sure you understand how each dial is changing the sound, and take note of any questions I can answer in class next week.
The patches you'll be creating won't sound particularly great, but will demonstrate the basic functions of the modular synth. Next week, you'll have more opportunities to make great sounding patches.
If you want more info on each module, please see this 618 Resources site, and scroll down to "All 618 Synthesizer Manuals".
Please refer to the Synthesis Notes shown in class.
Reminder: for the black modules, the OUTPUTS are either in gold or white. For the silver modules, the outputs are either black or labeled "output". Every other connector is an INPUT.
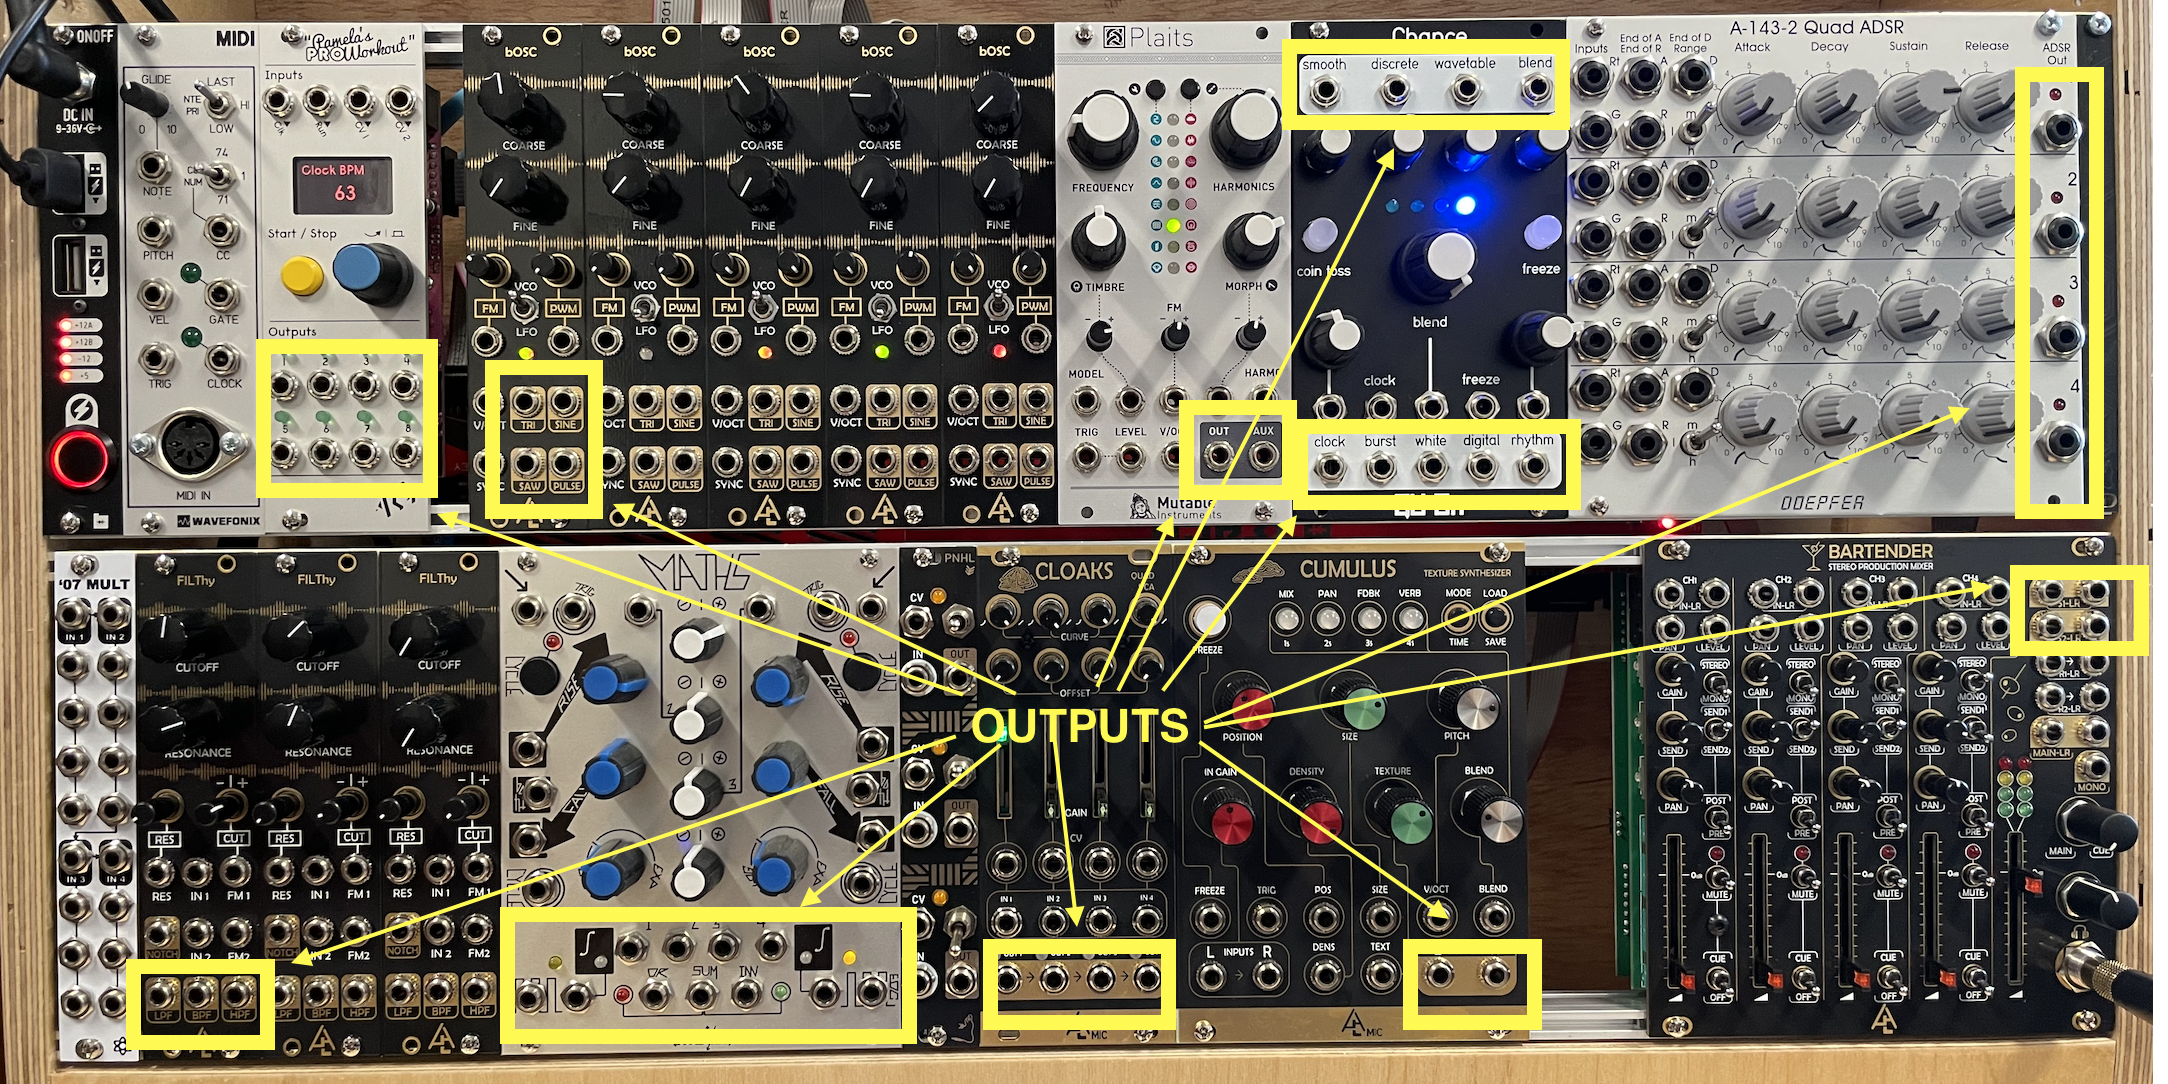
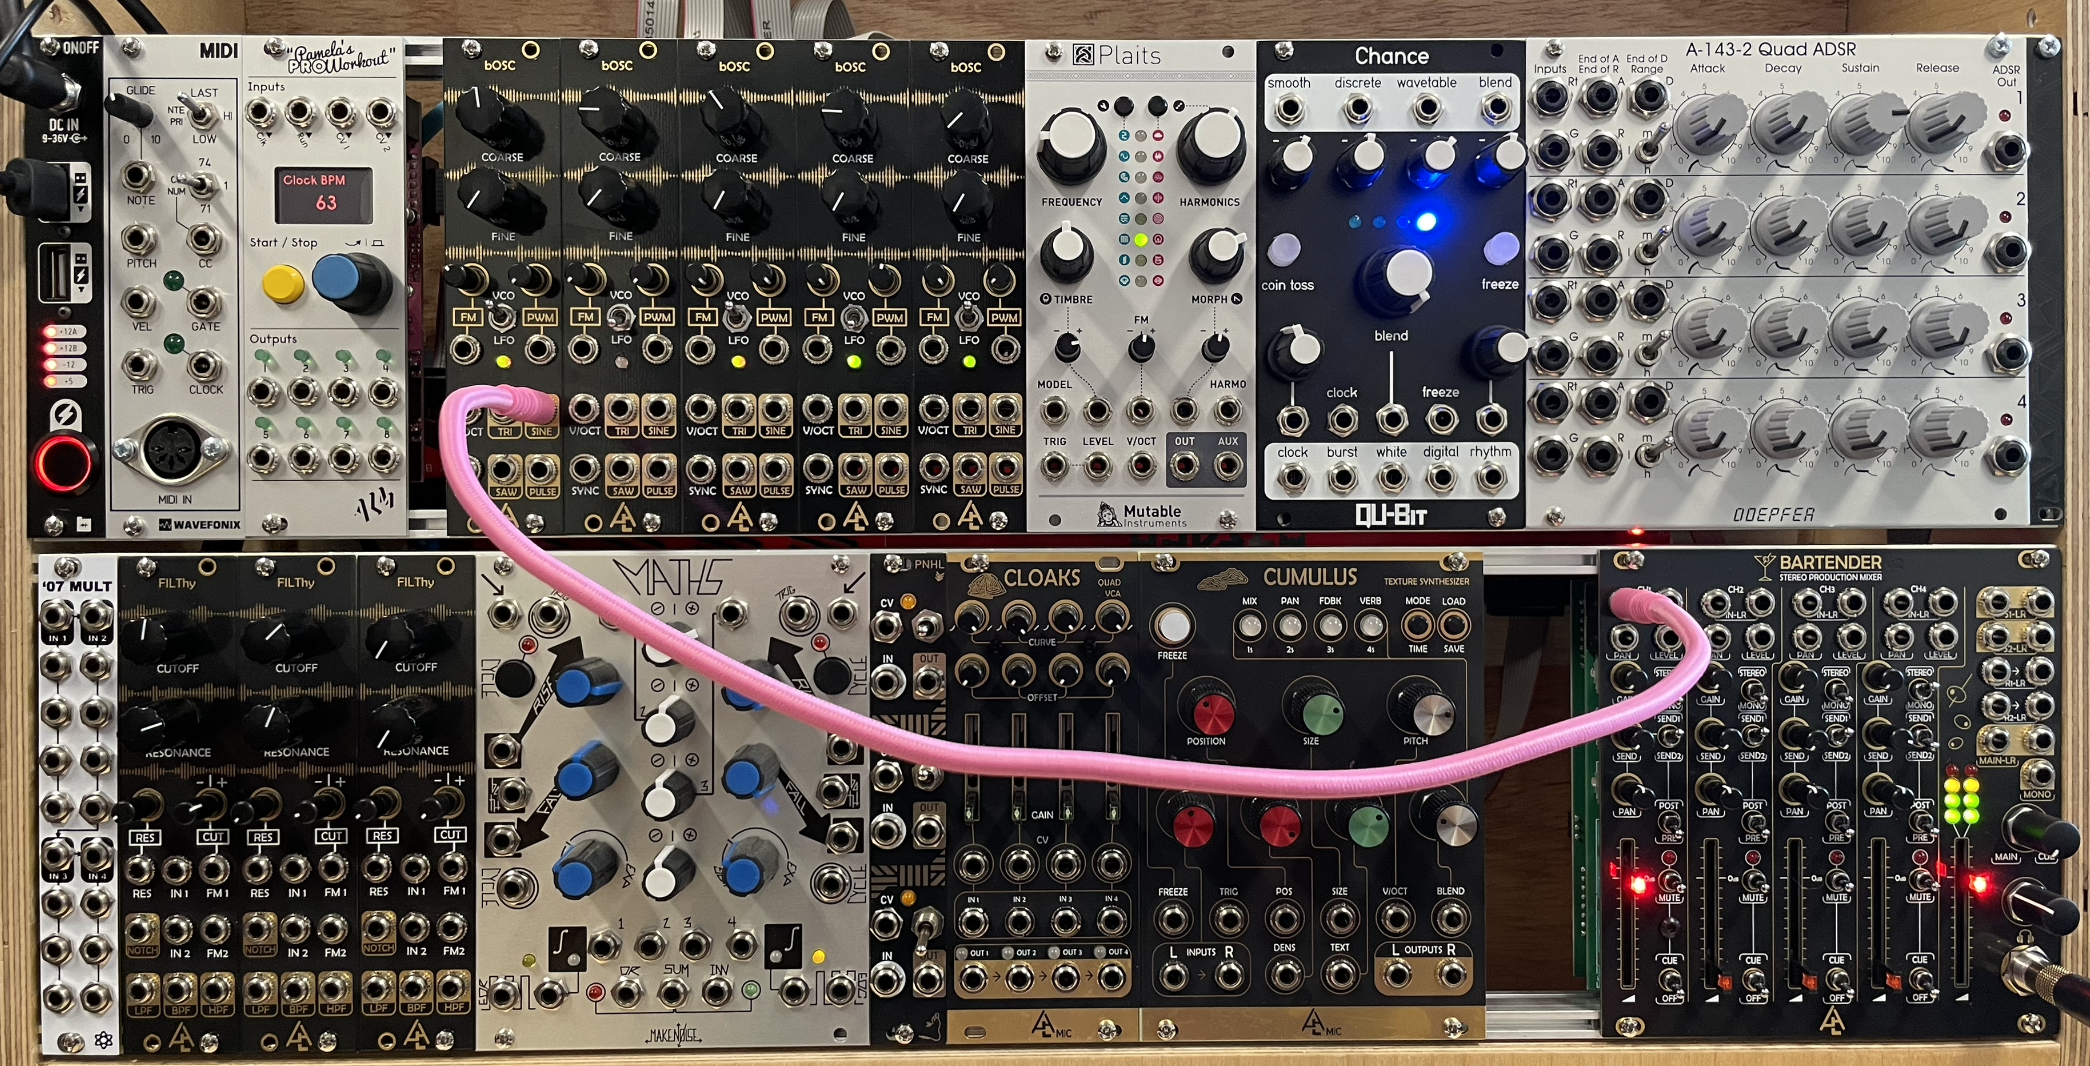
Basic Patch
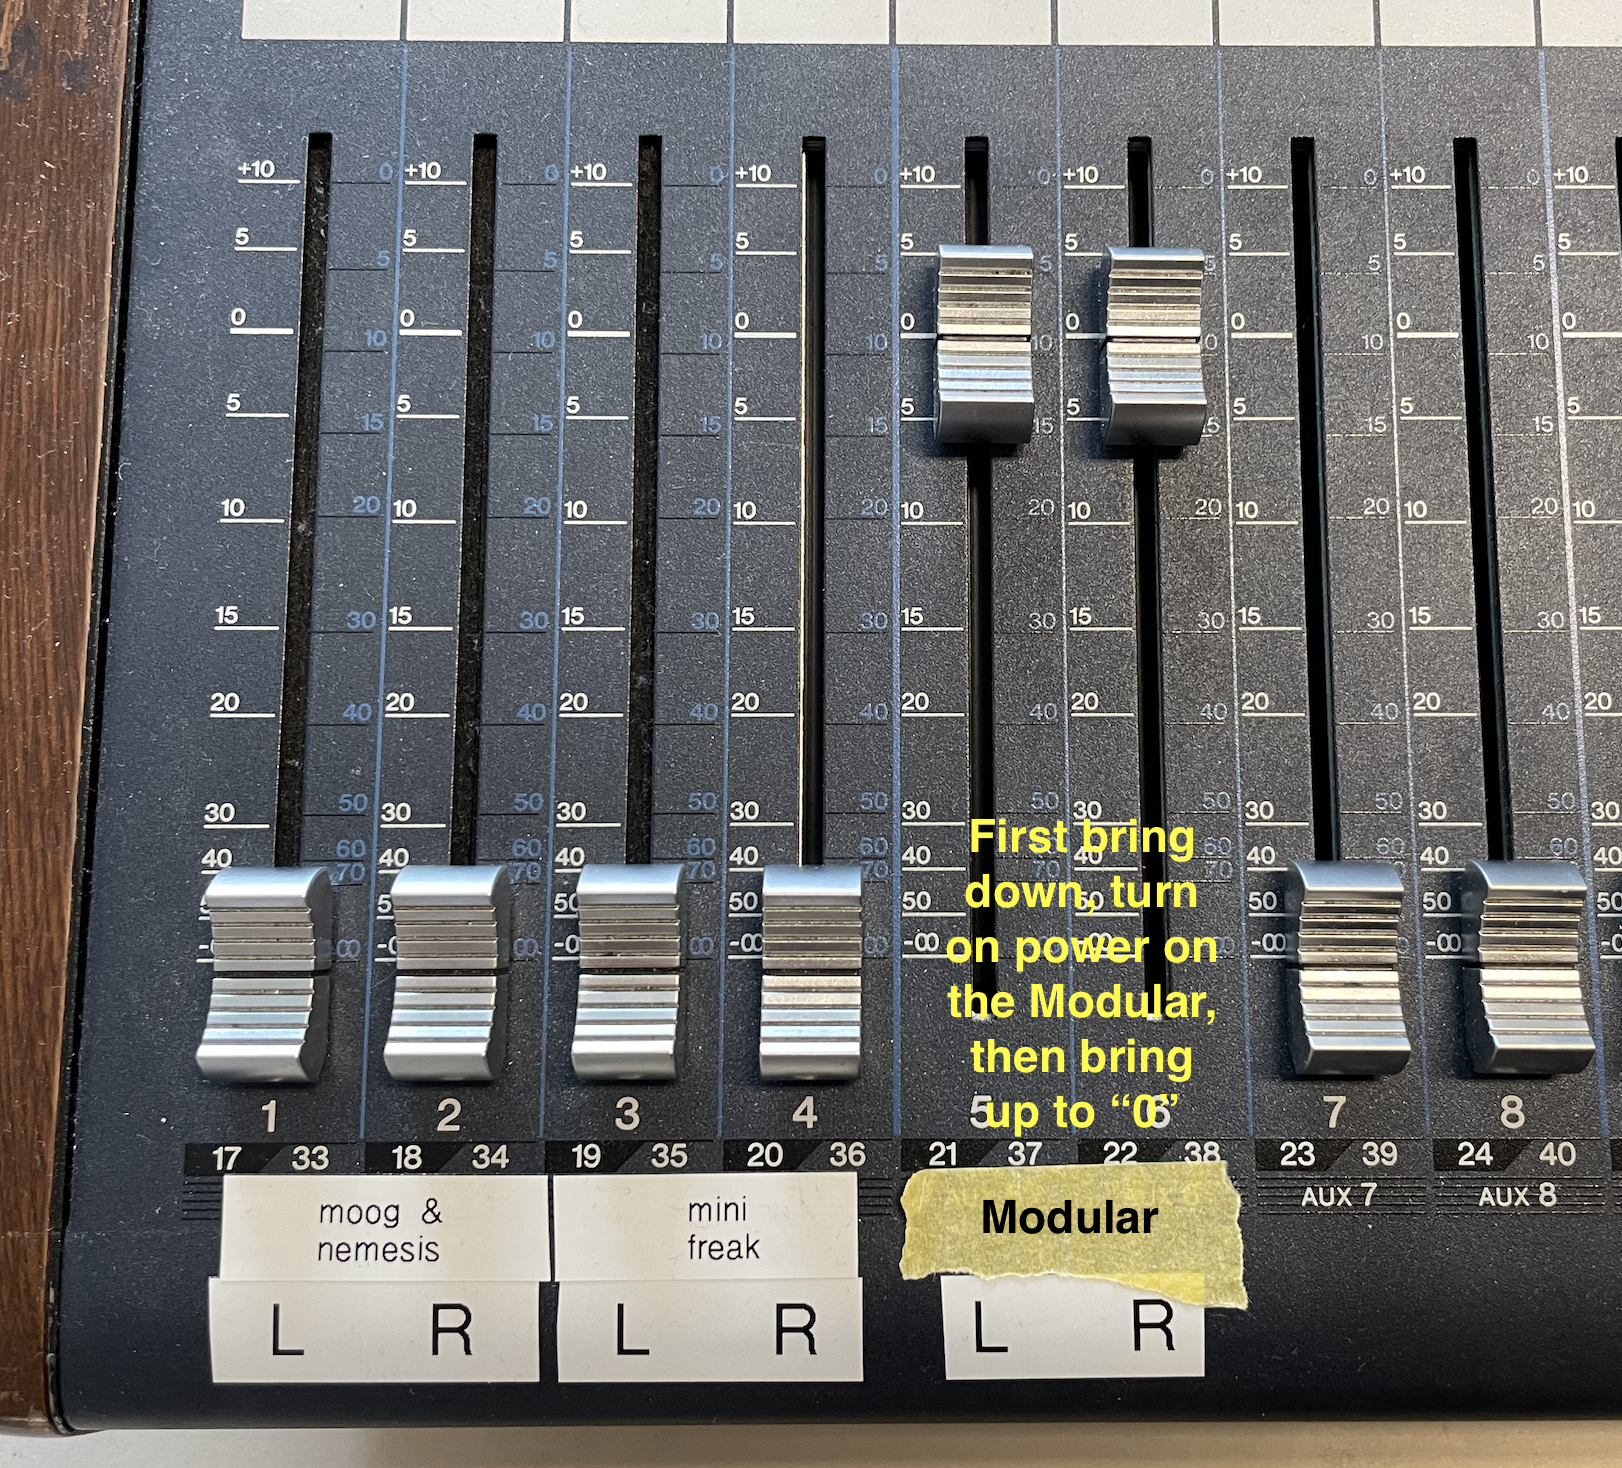
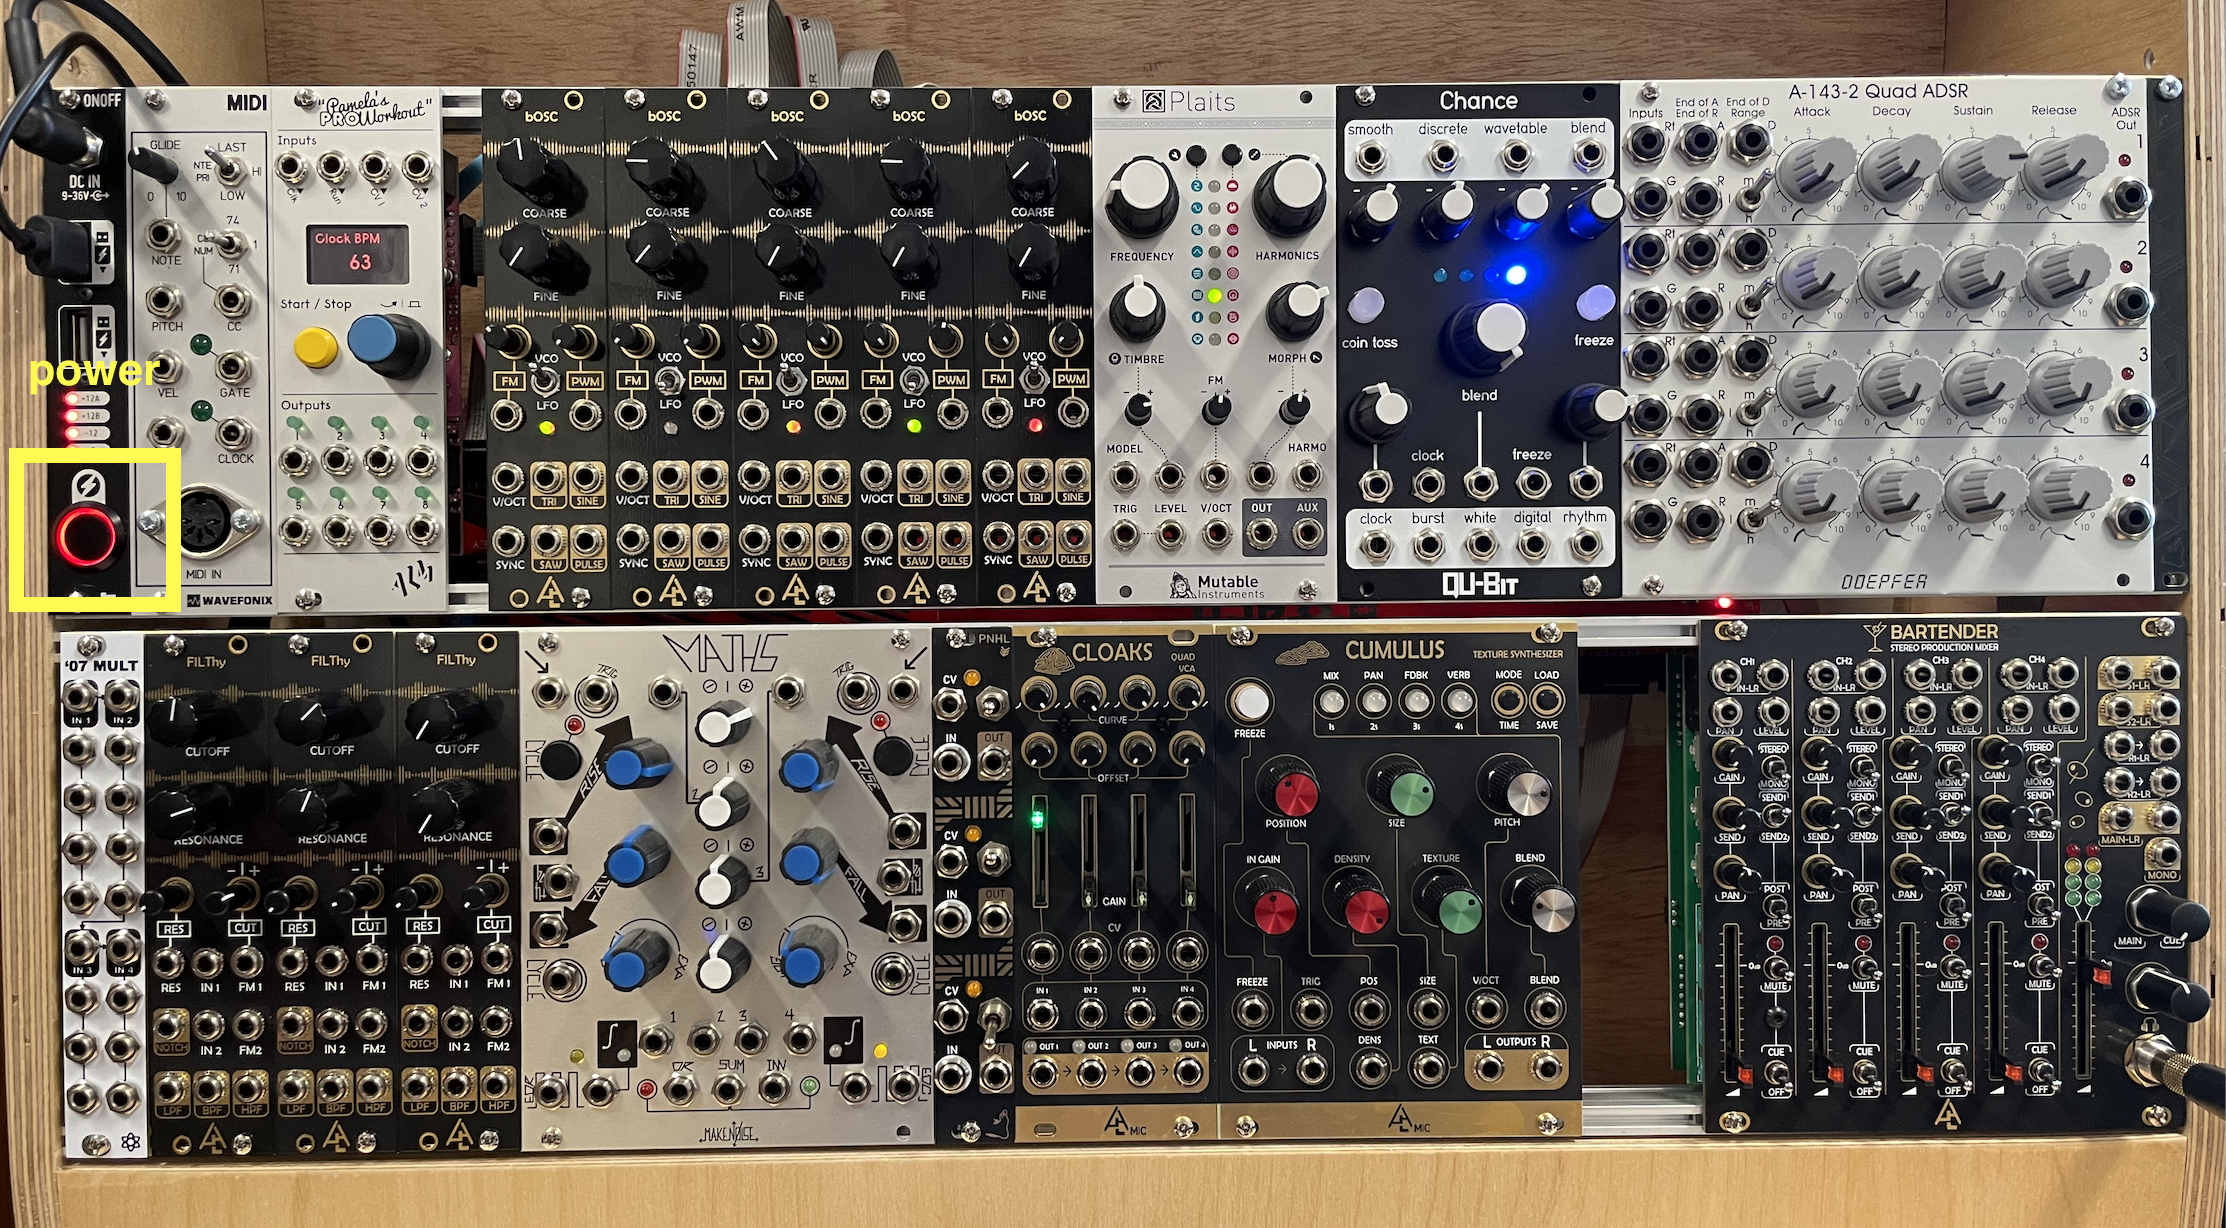
1) Make sure the "Modular" faders on the Yamaha mixer are down, then power-on the Modular (black button, top left), then bring the Yamaha faders up to "0".
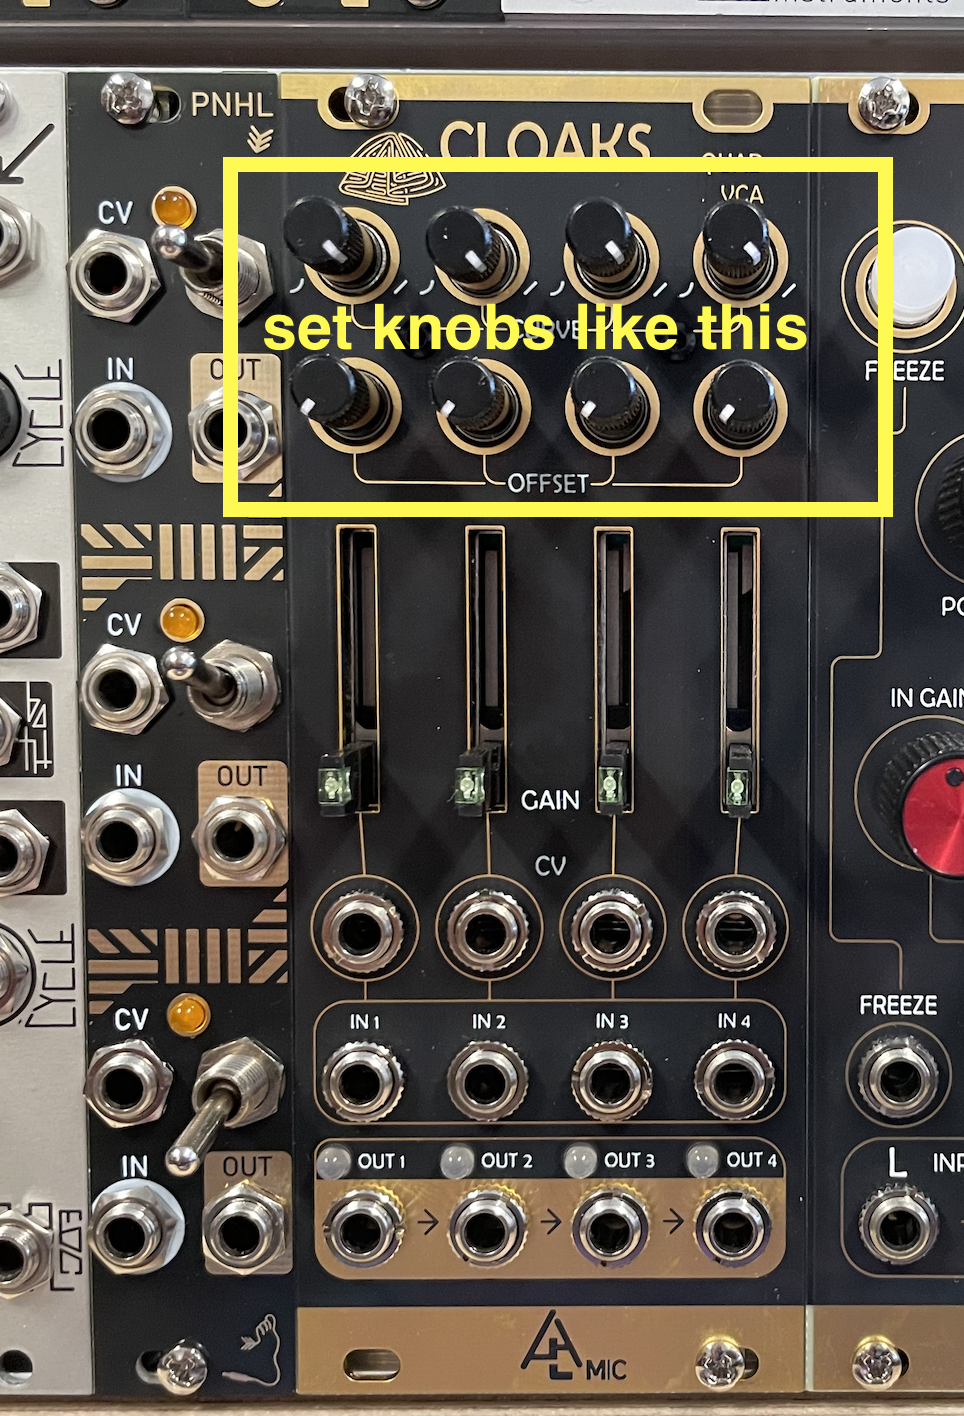
2) Reset the modular. There are too many things to reset, so you just need to make sure that the CURVE knobs at the top of the CLOAKS module are all the way to the right, and that the OFFSET knobs (just below the CURVE knobs) are all the way to the left.
3) Flip the switch of the bOSC oscillator to VCO, then Connect the its SINE output to the CH1 input of the BARTENDER MIXER (henceforth just called MIXER).
• On the MIXER, bring up the fader of CH1 as well as the MAIN fader (last one on the right), and bring up the headphone knob to about 12 o'clock. You should hear the sound of a sine wave.
• Play around with the COARSE knob of the oscillator and try the other three waveform outputs (TRI, SAW, PULSE; with PULSE, also turn the PWM knob).
Q1: what does the PWM knob do?
Q2: what does the FINE knob do?
4) Using the oscillator's SAW output, disconnect the cable from CH1 on the MIXER, and reconnect it to the IN1 of the FILThy filter.
• Then connect the LPF output of the filter to the CH1 on the MIXER. You should now hear the SAW wave but with reduced high partials.
• Play around with the CUTOFF and RESONANCE of the filter.
• Also, try the other filter type outputs on the filter (NOTCH, BPF, HPF).
• Go back to the LPF when done exploring.
Q3: what happens when you turn up the RESONANCE knob almost all the way?
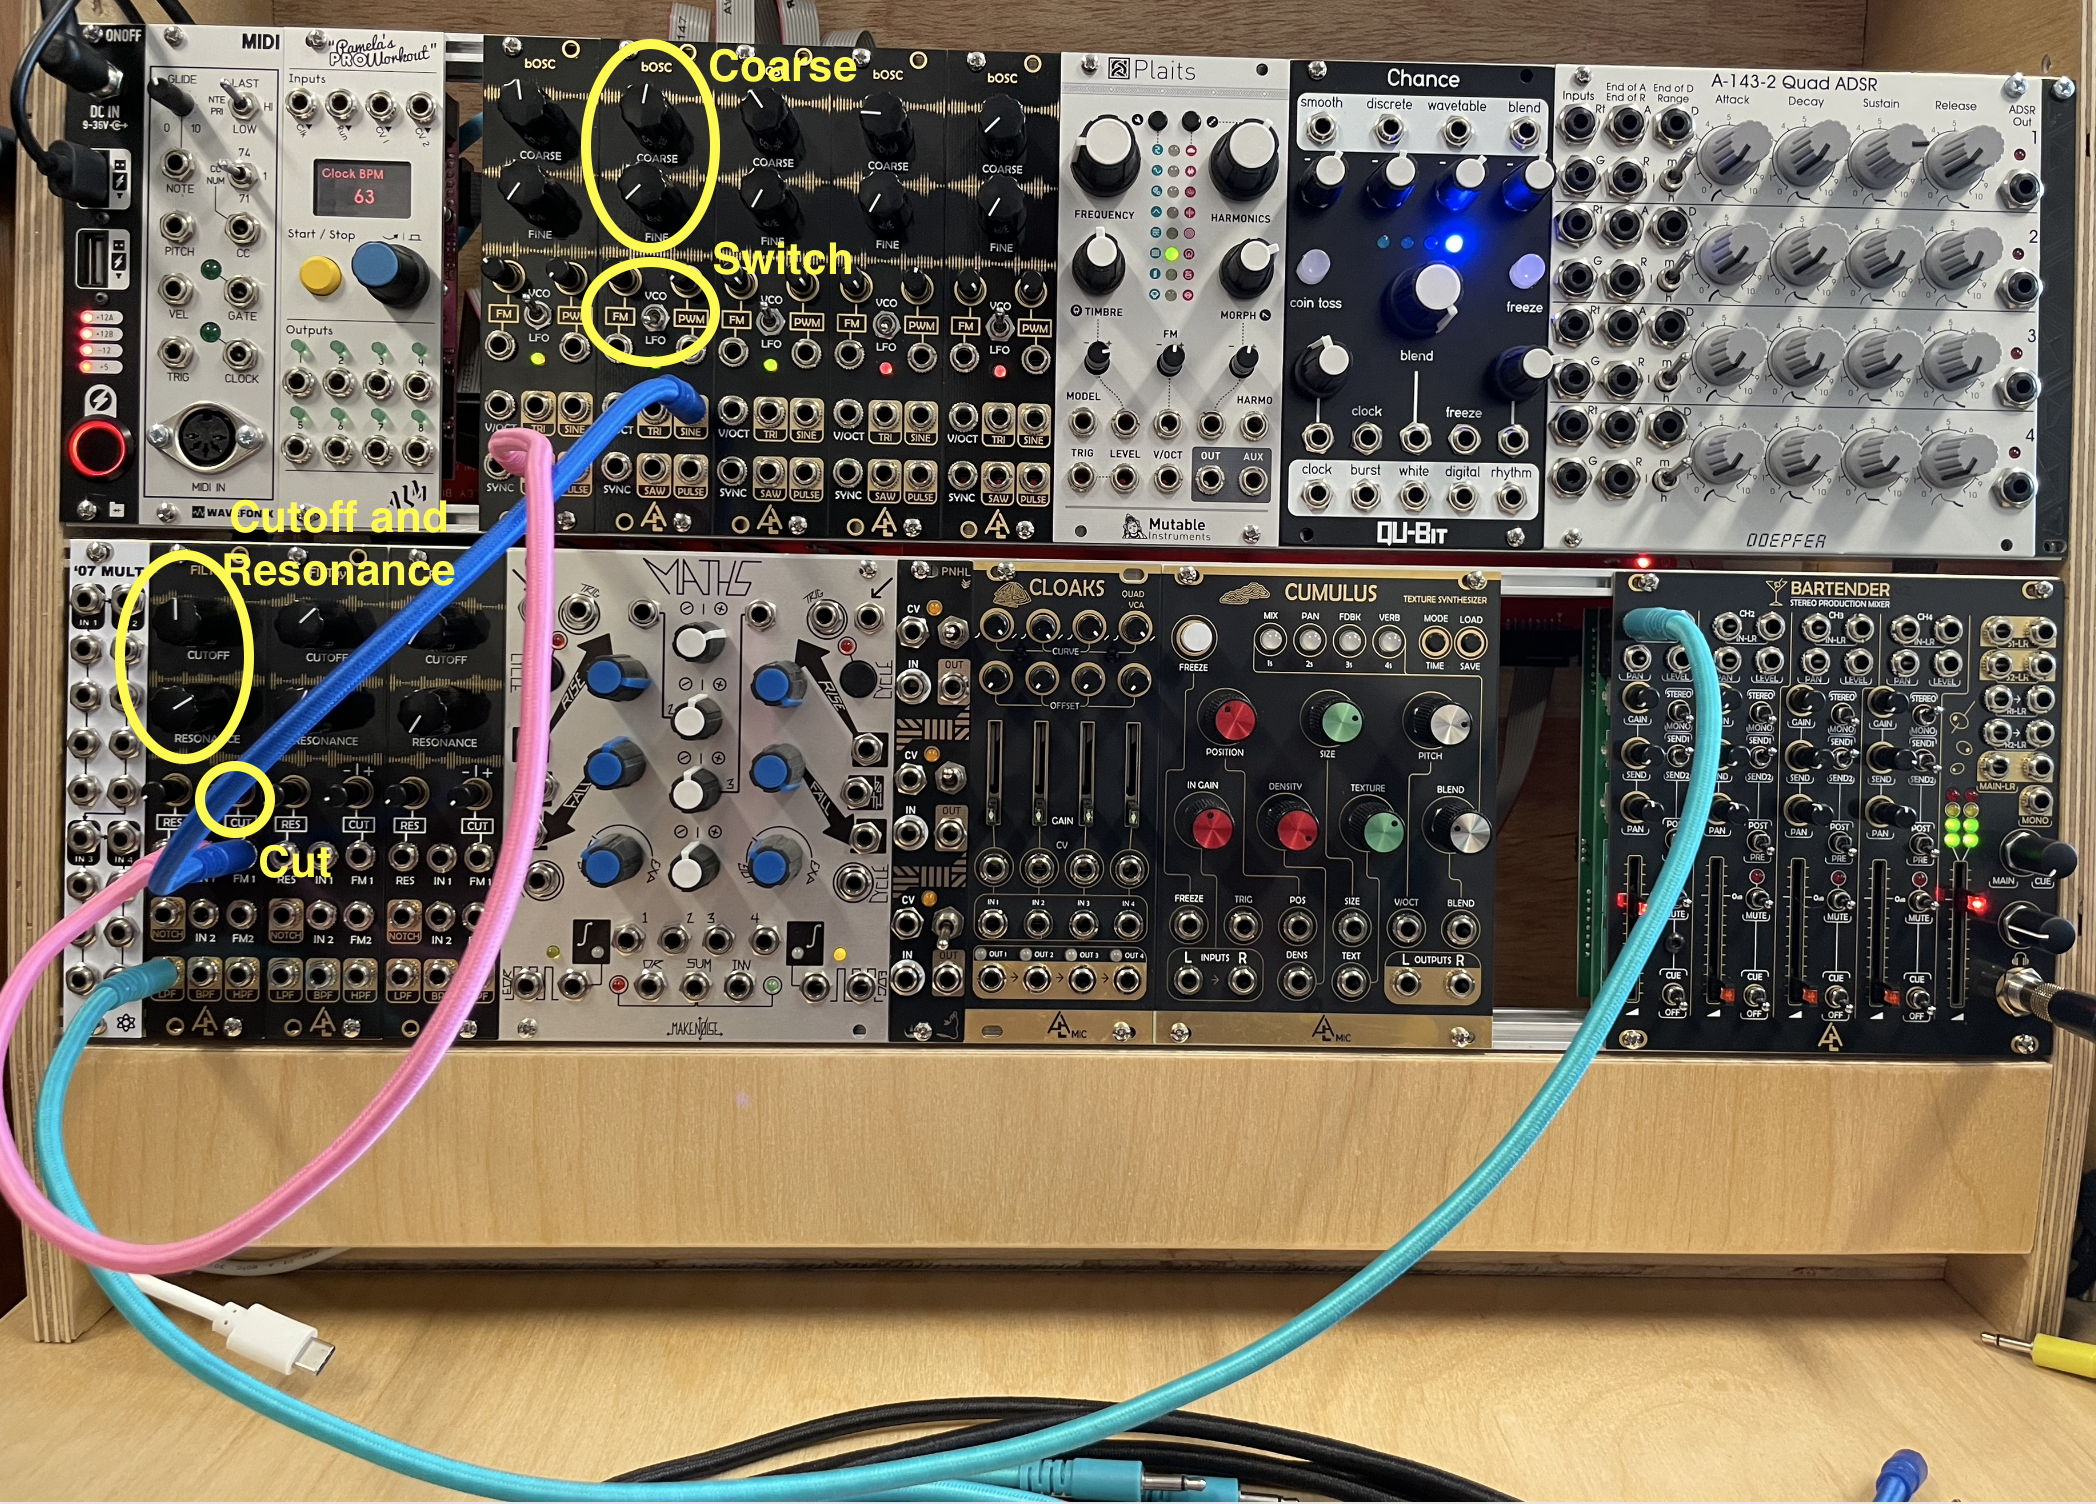
6) Connect the SINE output of a second bOSC oscillator to the FM1 input of the FILThy filter. This oscillator its now modulating the filter's frequency.
• Turn the small CUT knob on the filter all the way to the right.
• Play around with the COARSE knob of the second oscillator, and also try flipping of the VCO/LFO switch.
• Play around with the CUTOFF and RESONANCE knobs of the filter. Also try changing the small CUT knob on the filter.
Q4: what does the VCO/LFO switch do?
Q5: what does the small CUT knob do?
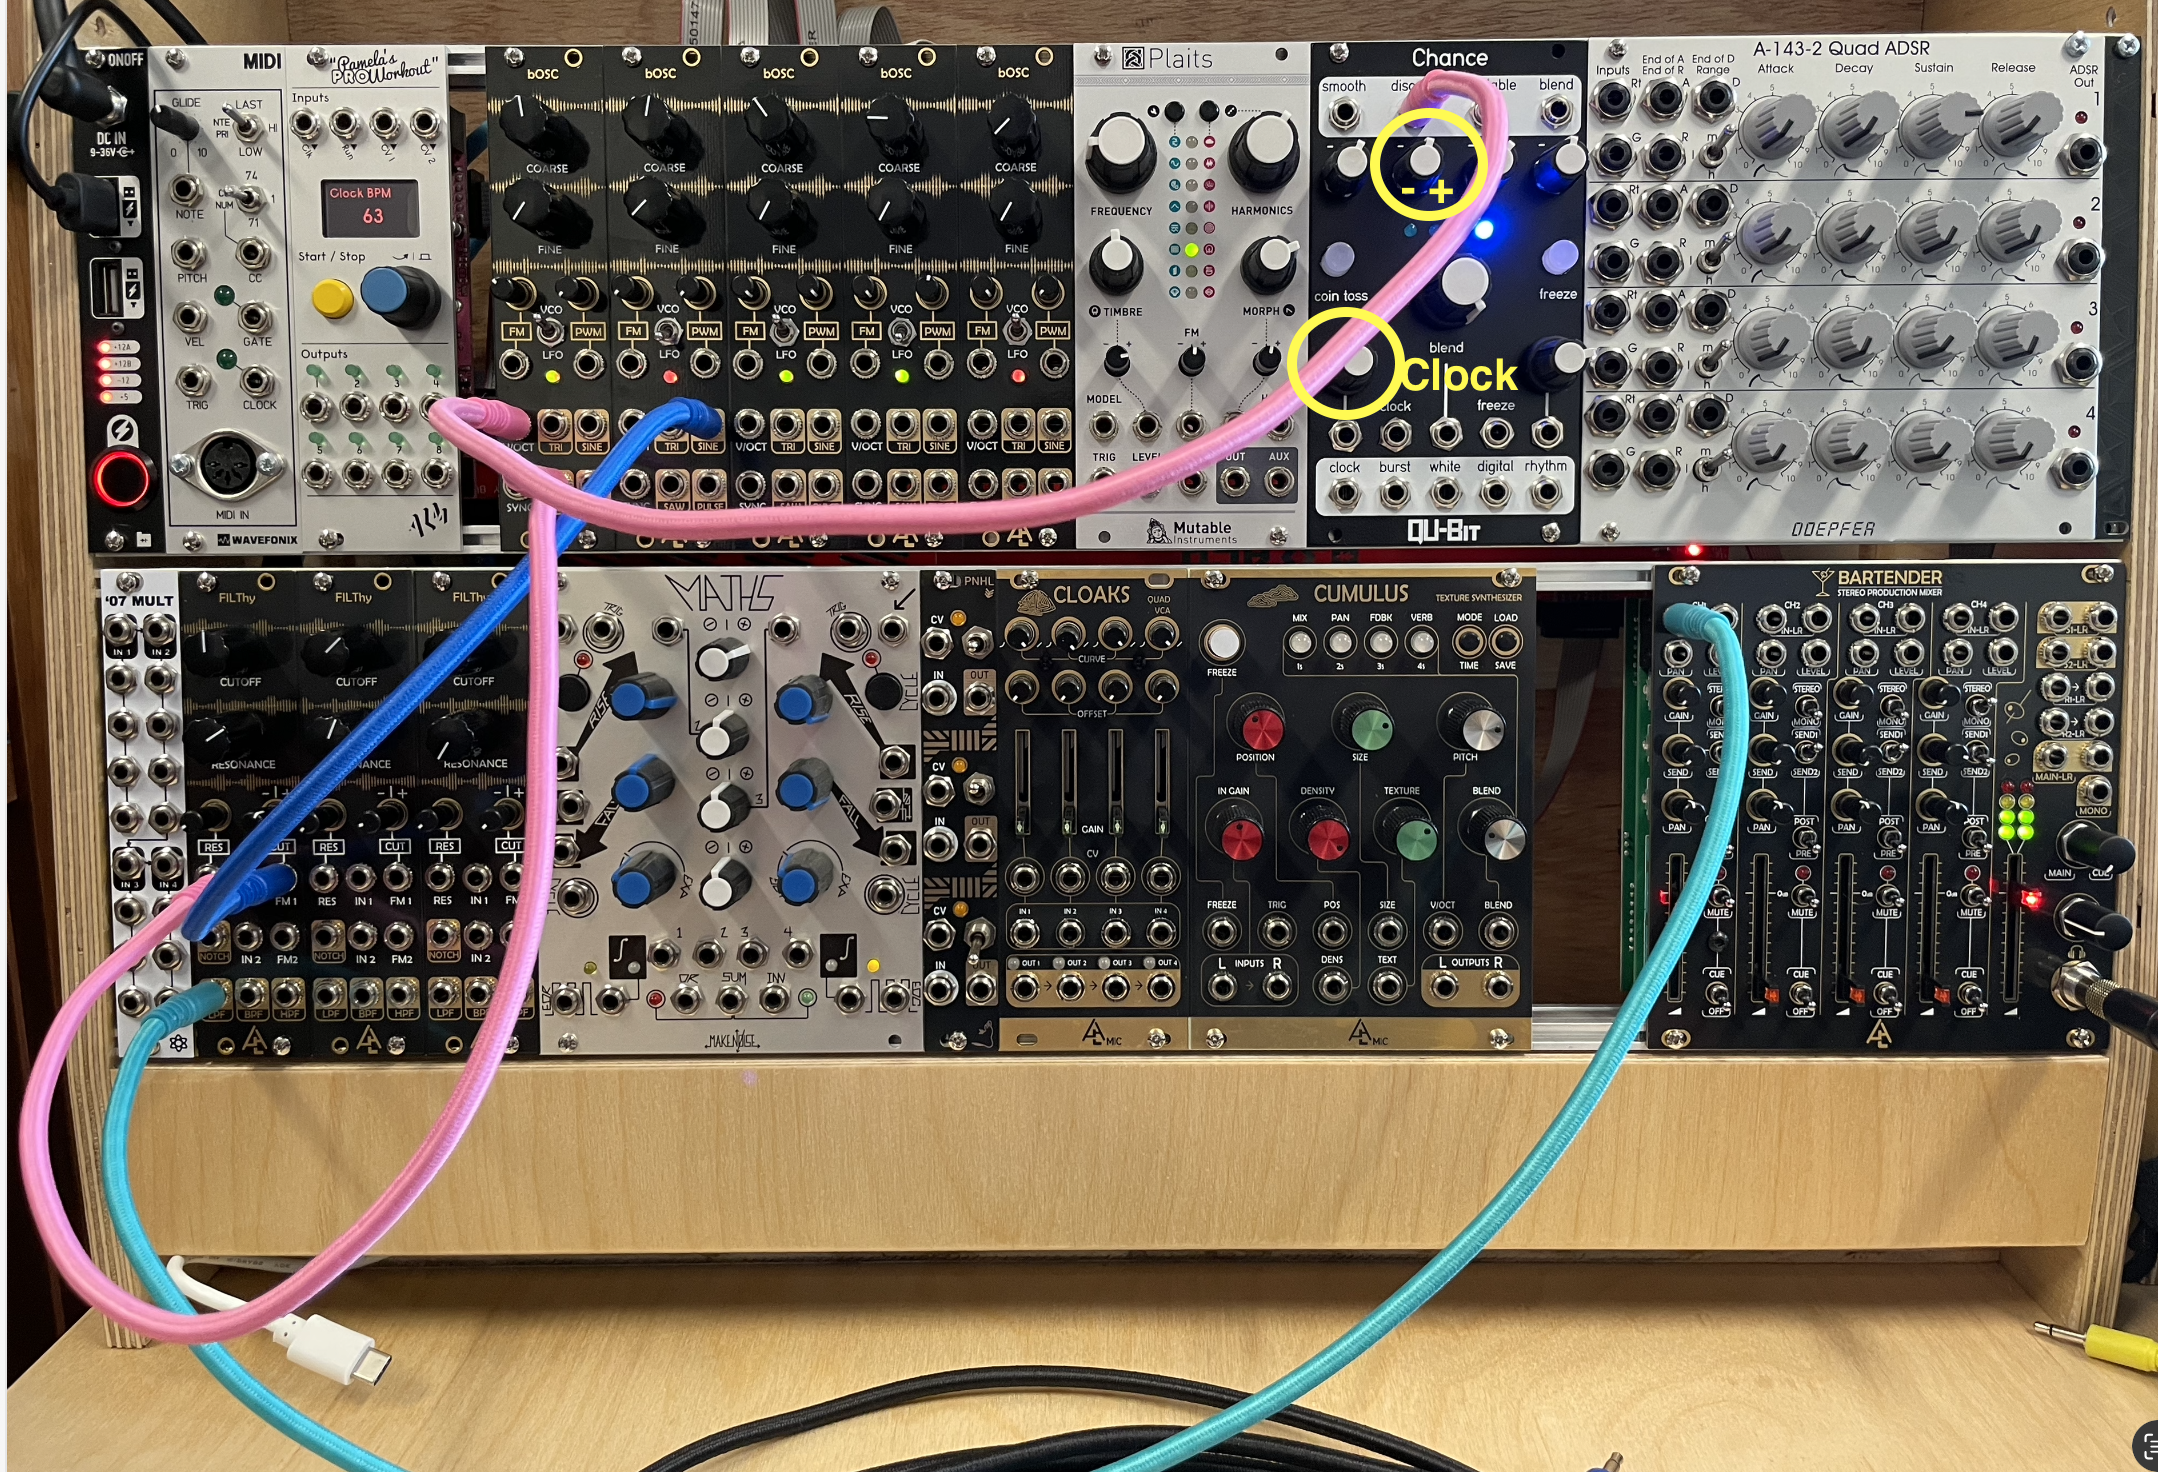
7) Connect the DISCRETE output of the CHANCE module to the V/OCT input of the first bOSC oscillator. You should now hear the pitch of the SAW wave change randomly.
What's going on: The V/OCT input controls the pitch of the oscillator, and the DISCRETE output produces a series of random pitches (created by a sample-and-hold process, see Synthesis Notes).
• You can modify the rate of the pitch changes by turning the CLOCK knob, and you can adjust the span (i.e., tessitura) of the pitches by turning the "- +" knob.
8) So far, you've created a steady, uninterrupted sound. To create a pulse, we need to apply an ADSR envelope to the sound, which is triggered by a clock (i.e., metronome).
• Start by connecting the "output 1" of the PAMELA'S PRO WORKOUT module (henceforth called PAMs) to the G1 input of the Quad ADSR module.
• Then Connect the OUT1 of the ADSR to the CV1 input on the CLOAKS Module.
• Now connect the LPF output of the FILThy filter to the IN1 of CLOAKS, and finally connect the OUT1 of the CLOAKS to the CH1 input on the Mixer.
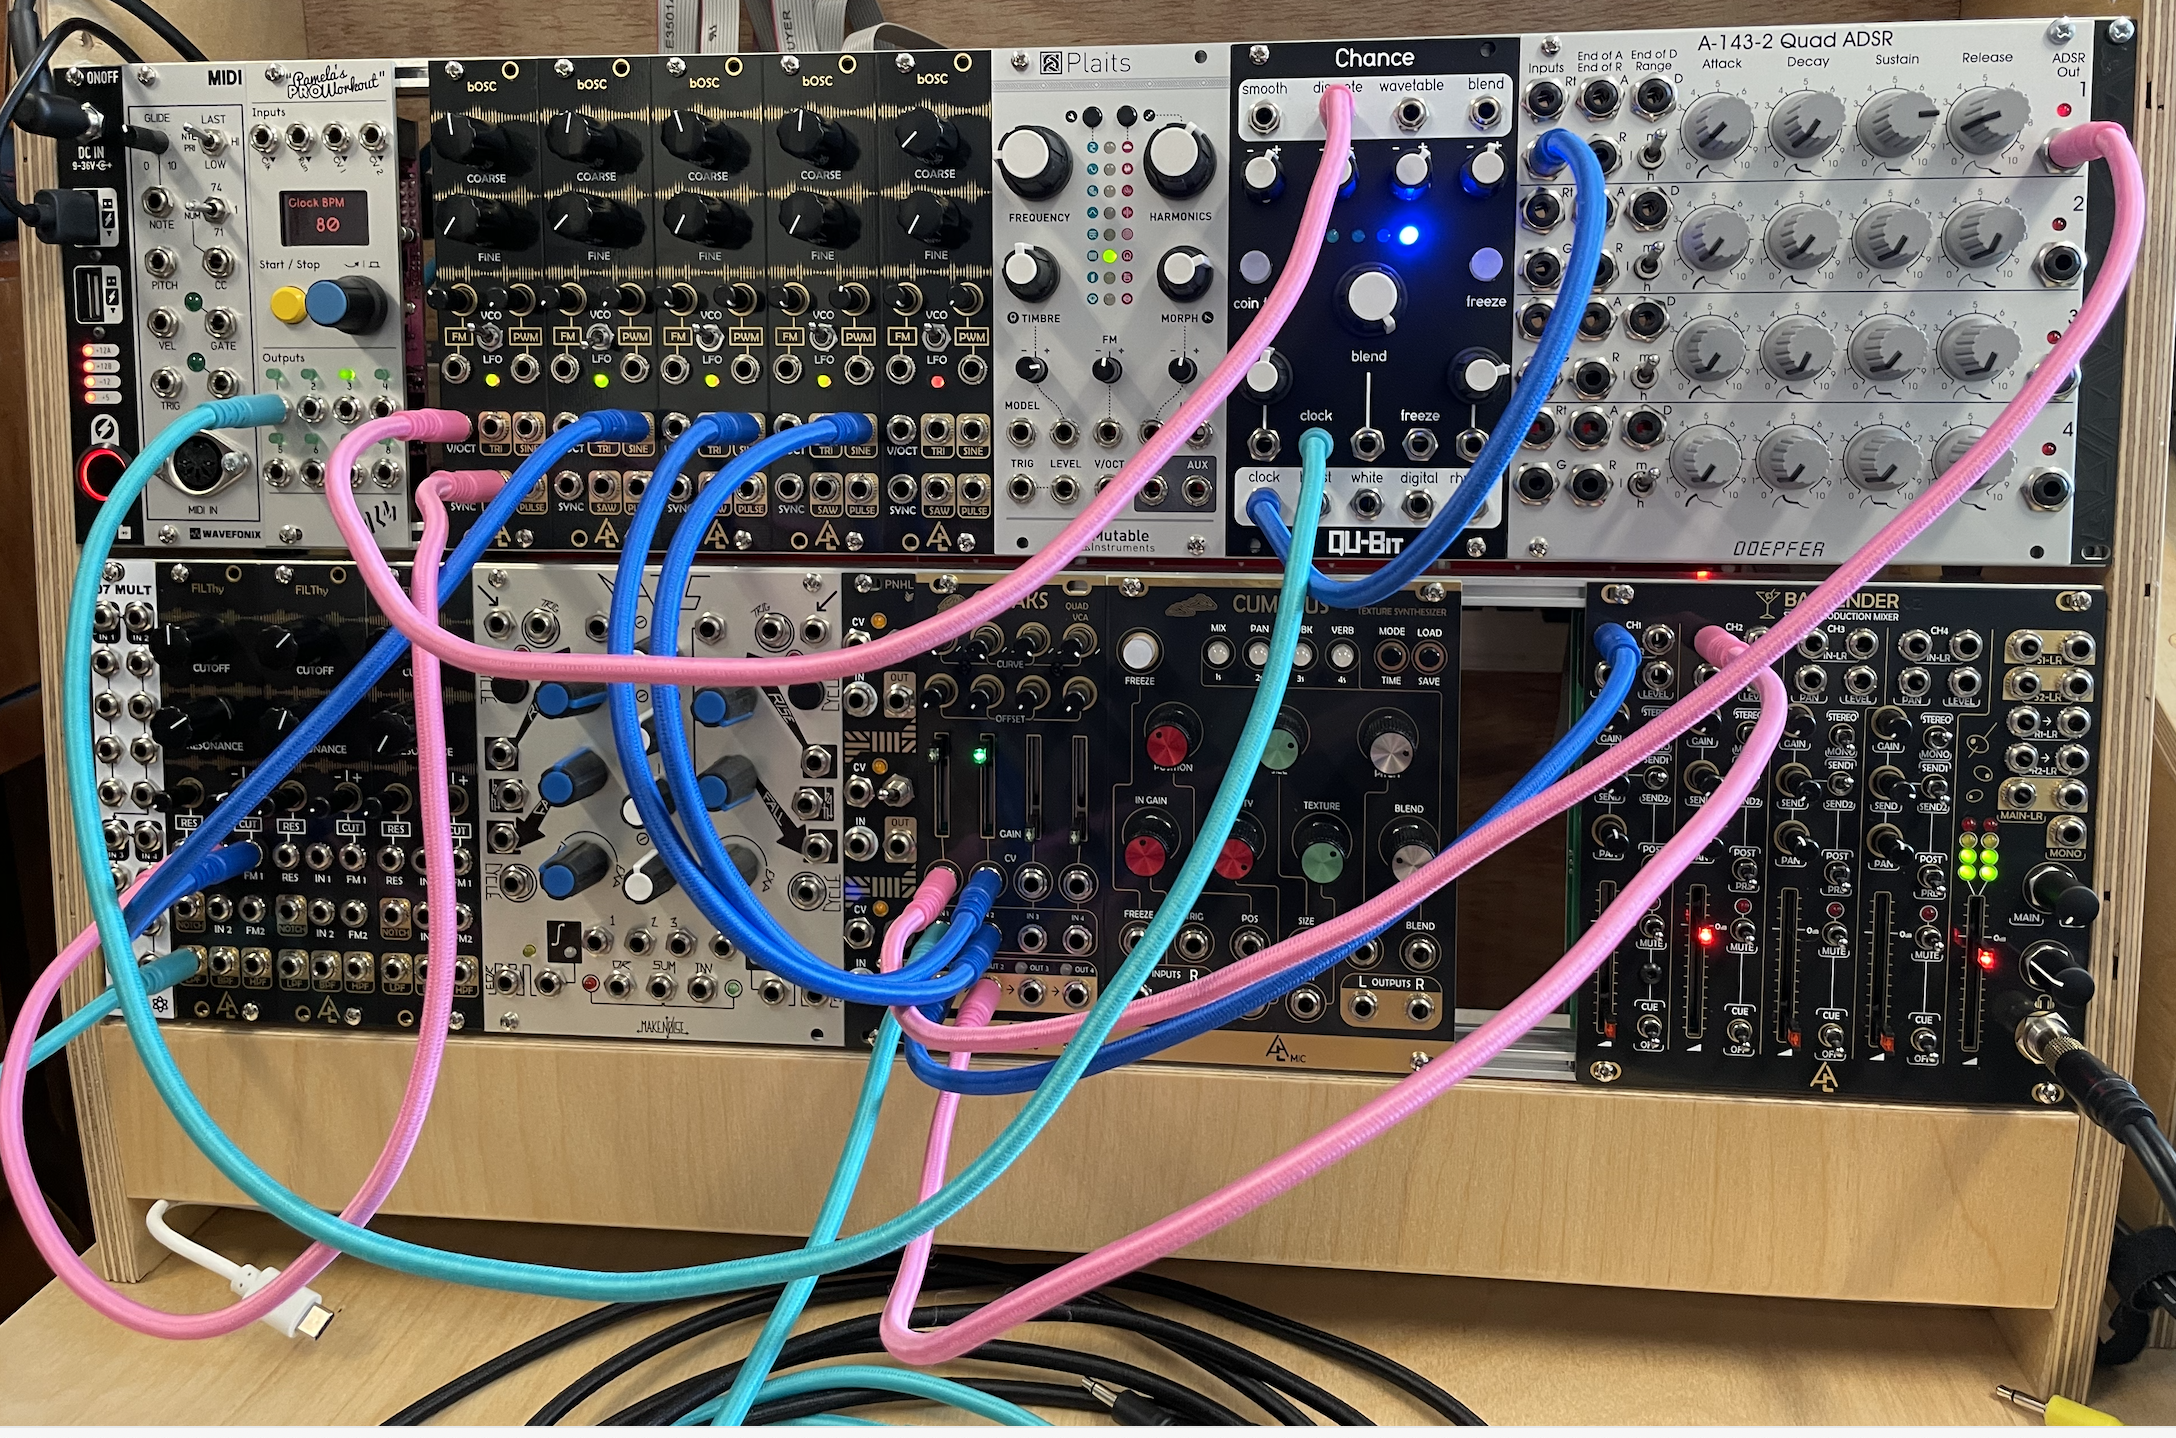
• Set the ADSR knob as in the picture below.
• Raise the first fader on CLOAKS, and press the START/STOP buttons on PAMs; you should now hear a pulse.

What's going on: PAMs outputs a clock signal, which is basically a square wave. The ADSR envelope module looks at this square wave and, every time the wave goes above a threshold, it triggers the envelope. When the wave goes below the threshold, it triggers the RELEASE (i.e., the fade out) of the envelope.
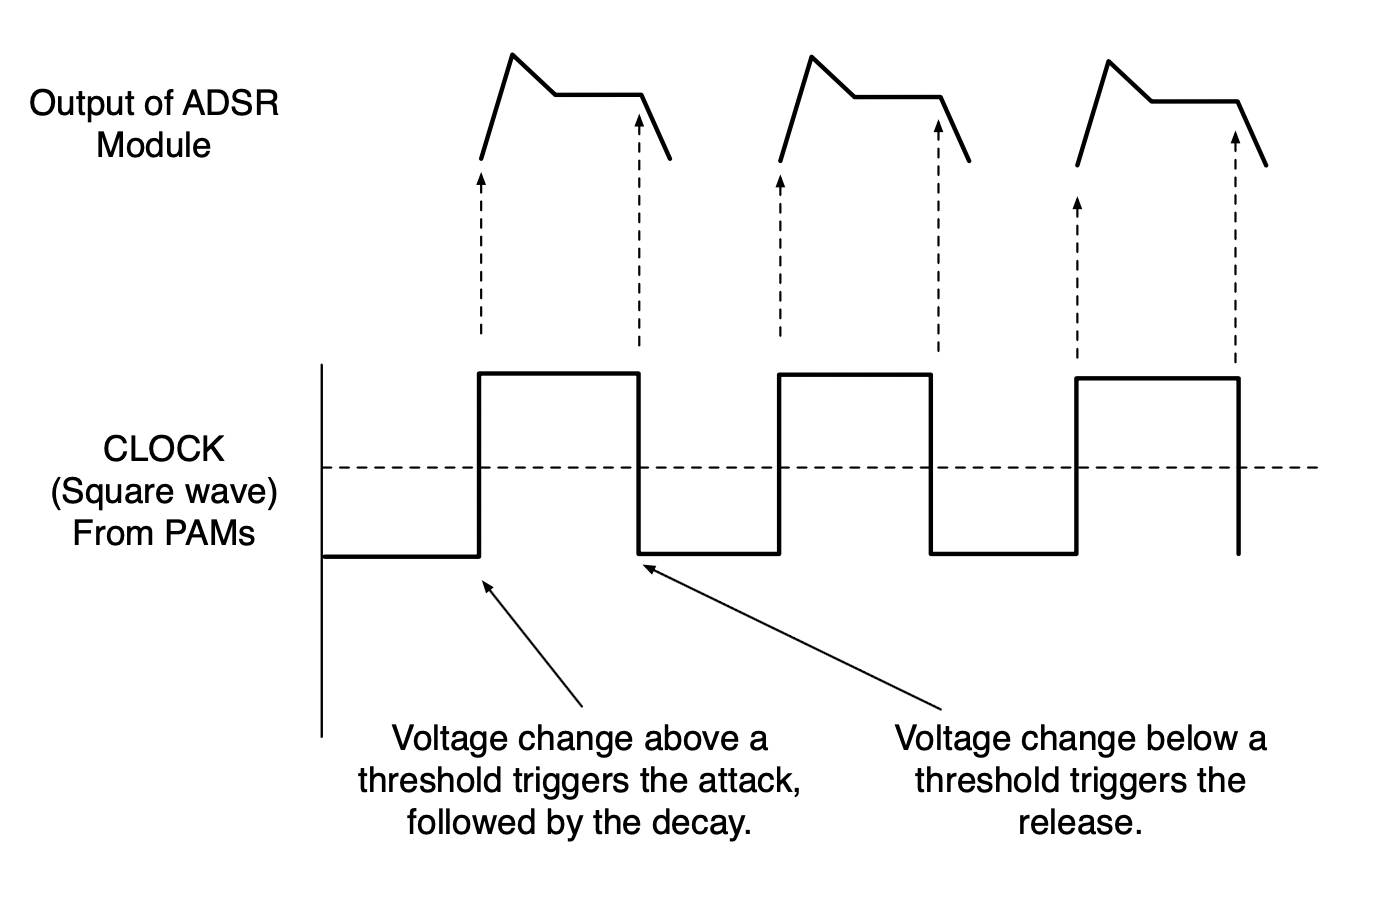
Furthermore, CLOAKS is a Voltage Controlled Amplifier (VCA), which is basically a type of mixer. It allows you to control the amplitude of one signal (the input) with another signal called a Control Voltage (CV). In other words, the waveform of a signal connected to a CV input will be applied to the amplitude of a signal connected to the input. The CV can be any signal, but are typically from an ADSR or an LFO.
9) Experiment with changing the ADSR knobs.
Q6: what happens if you set the Attack knob at the max position? Why?
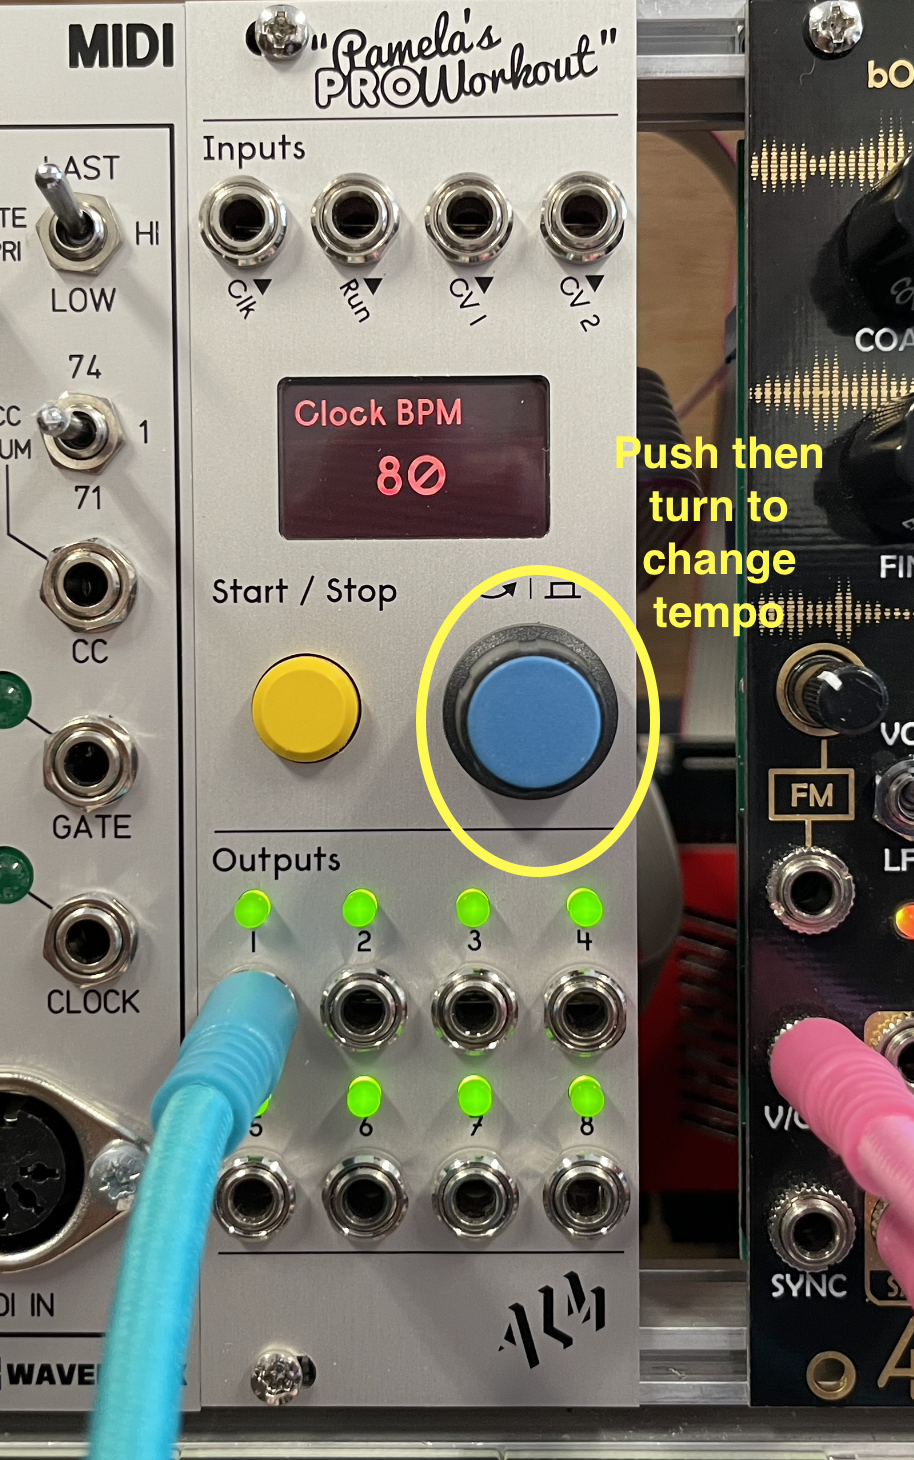
10) You can change the tempo of the CLOCK by turning the knob on PAMs until you see BPM. Then push on the knob and turn the knob to change the tempo.
***NOTE: PLEASE ONLY CHANGE THE TEMPO ON PAMs. Do not change anything else; we will do that next week.
11) Notice that the pitch changes are not synchronized to the pulses. To make it so that the pitch changes only occur with a new pulse, the CHANCES module must follow the same clock as the ADSR module.
• To do this, disconnect the cable from the G1 input on the Quad ADSR module, and move it to the CLOCK input on the CHANCES module.
• Then connect the CLOCK output to the G1 input on the ADSR. The pitches will now be synched to the pulses.
Q7: What happens to the pitch when you set a very long release on the ADSR?
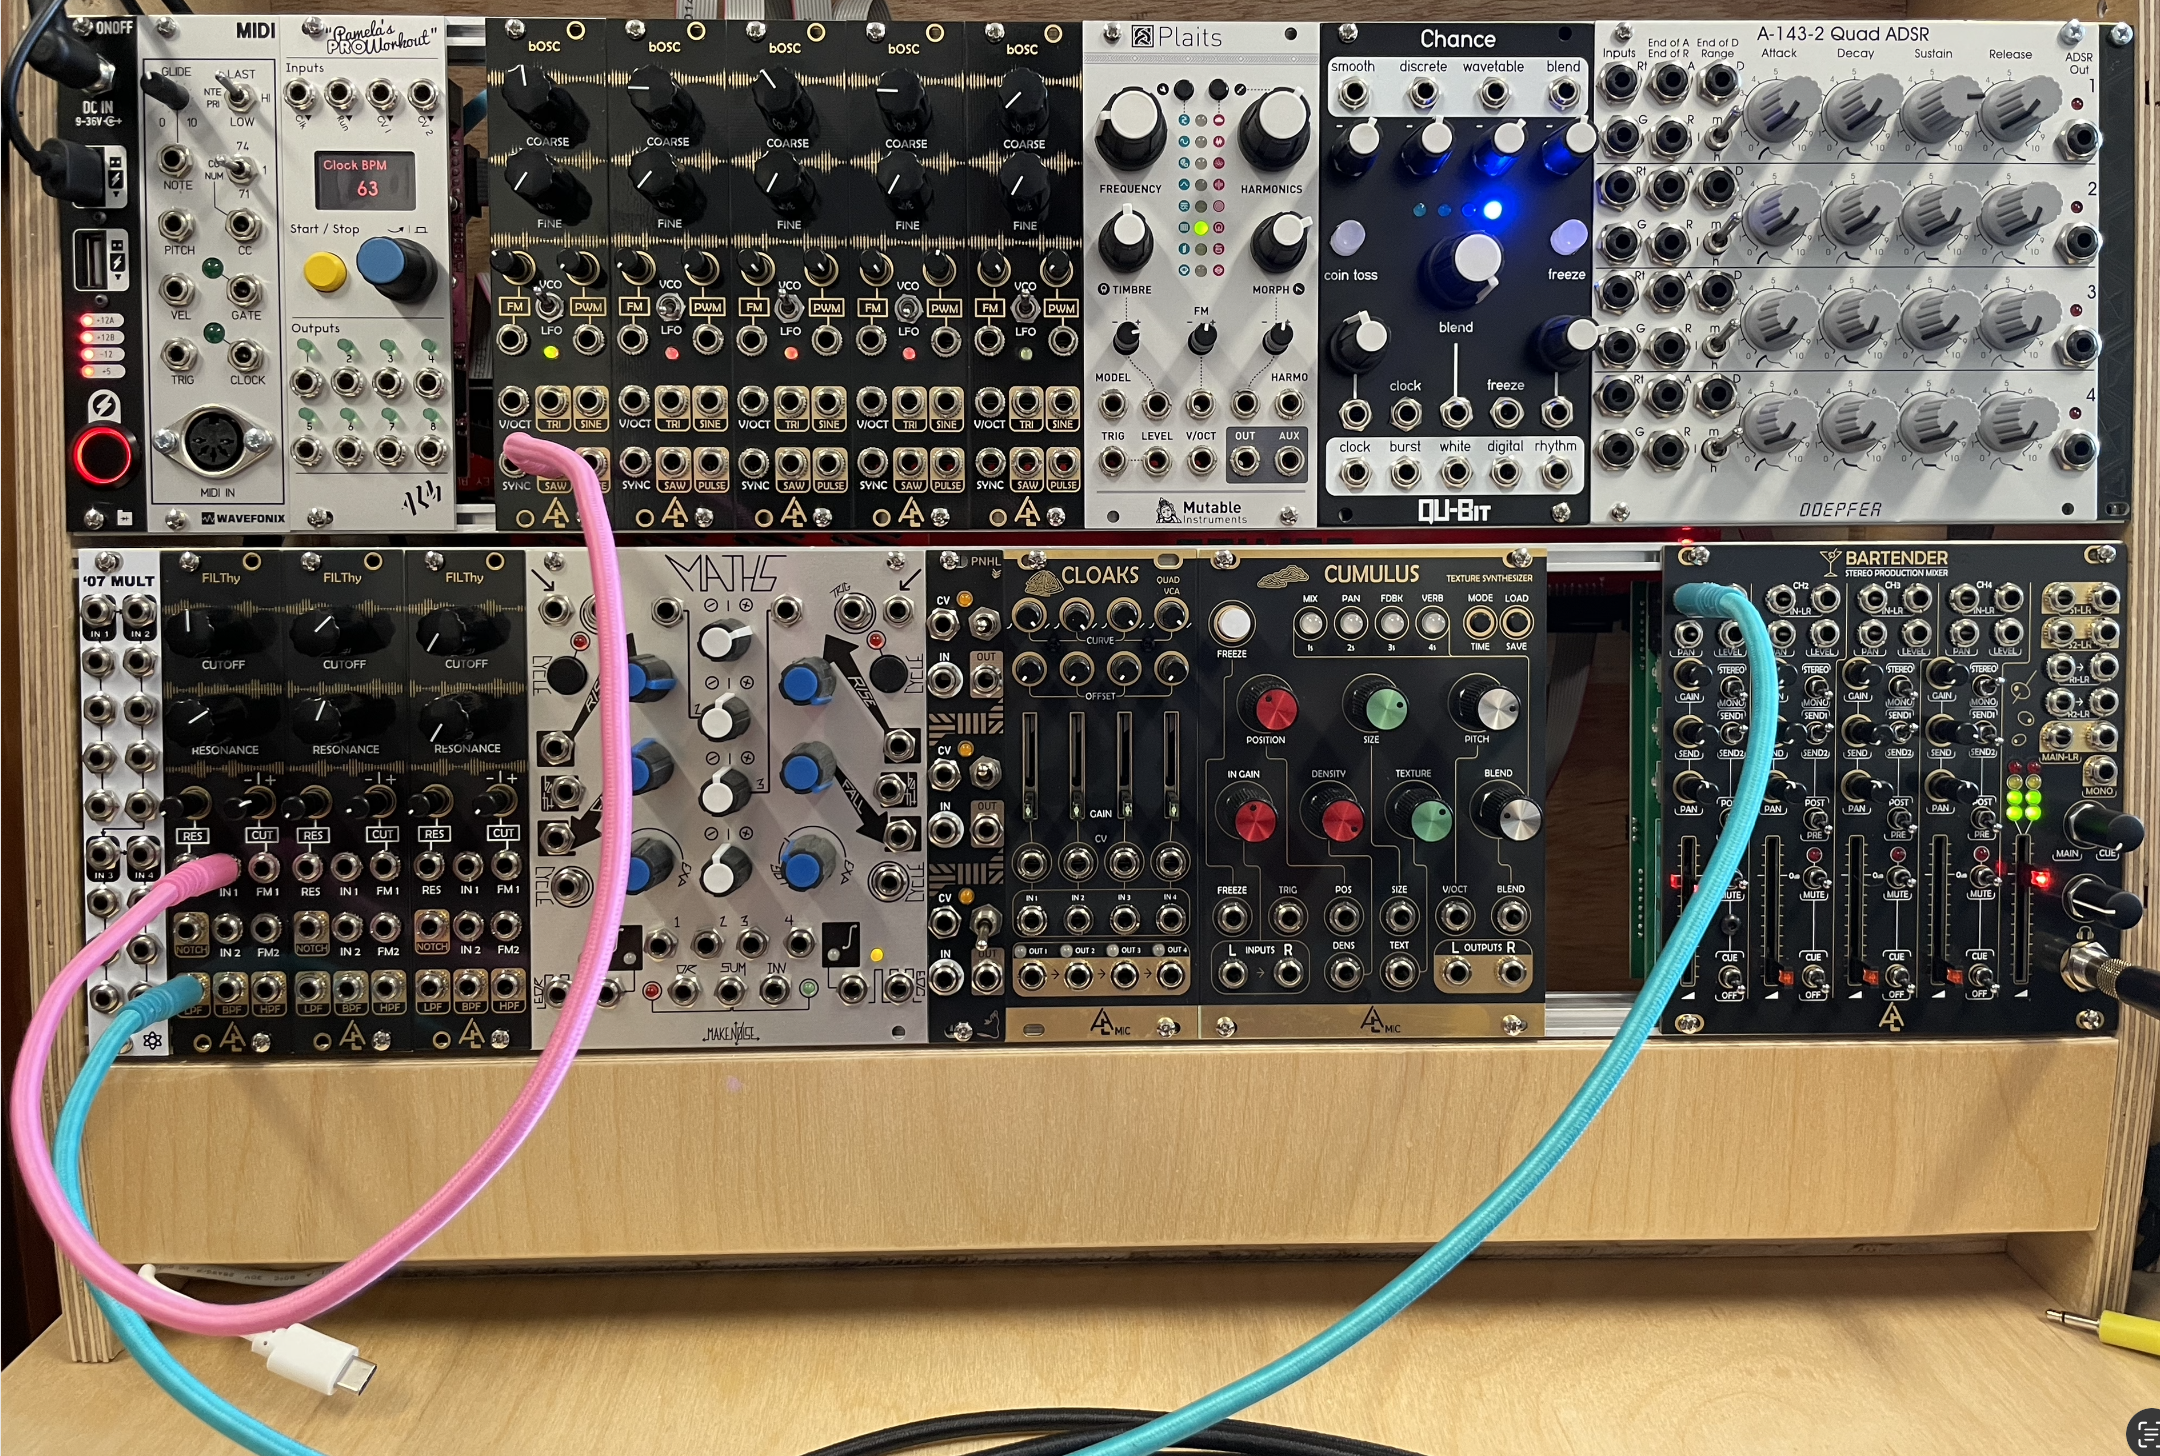
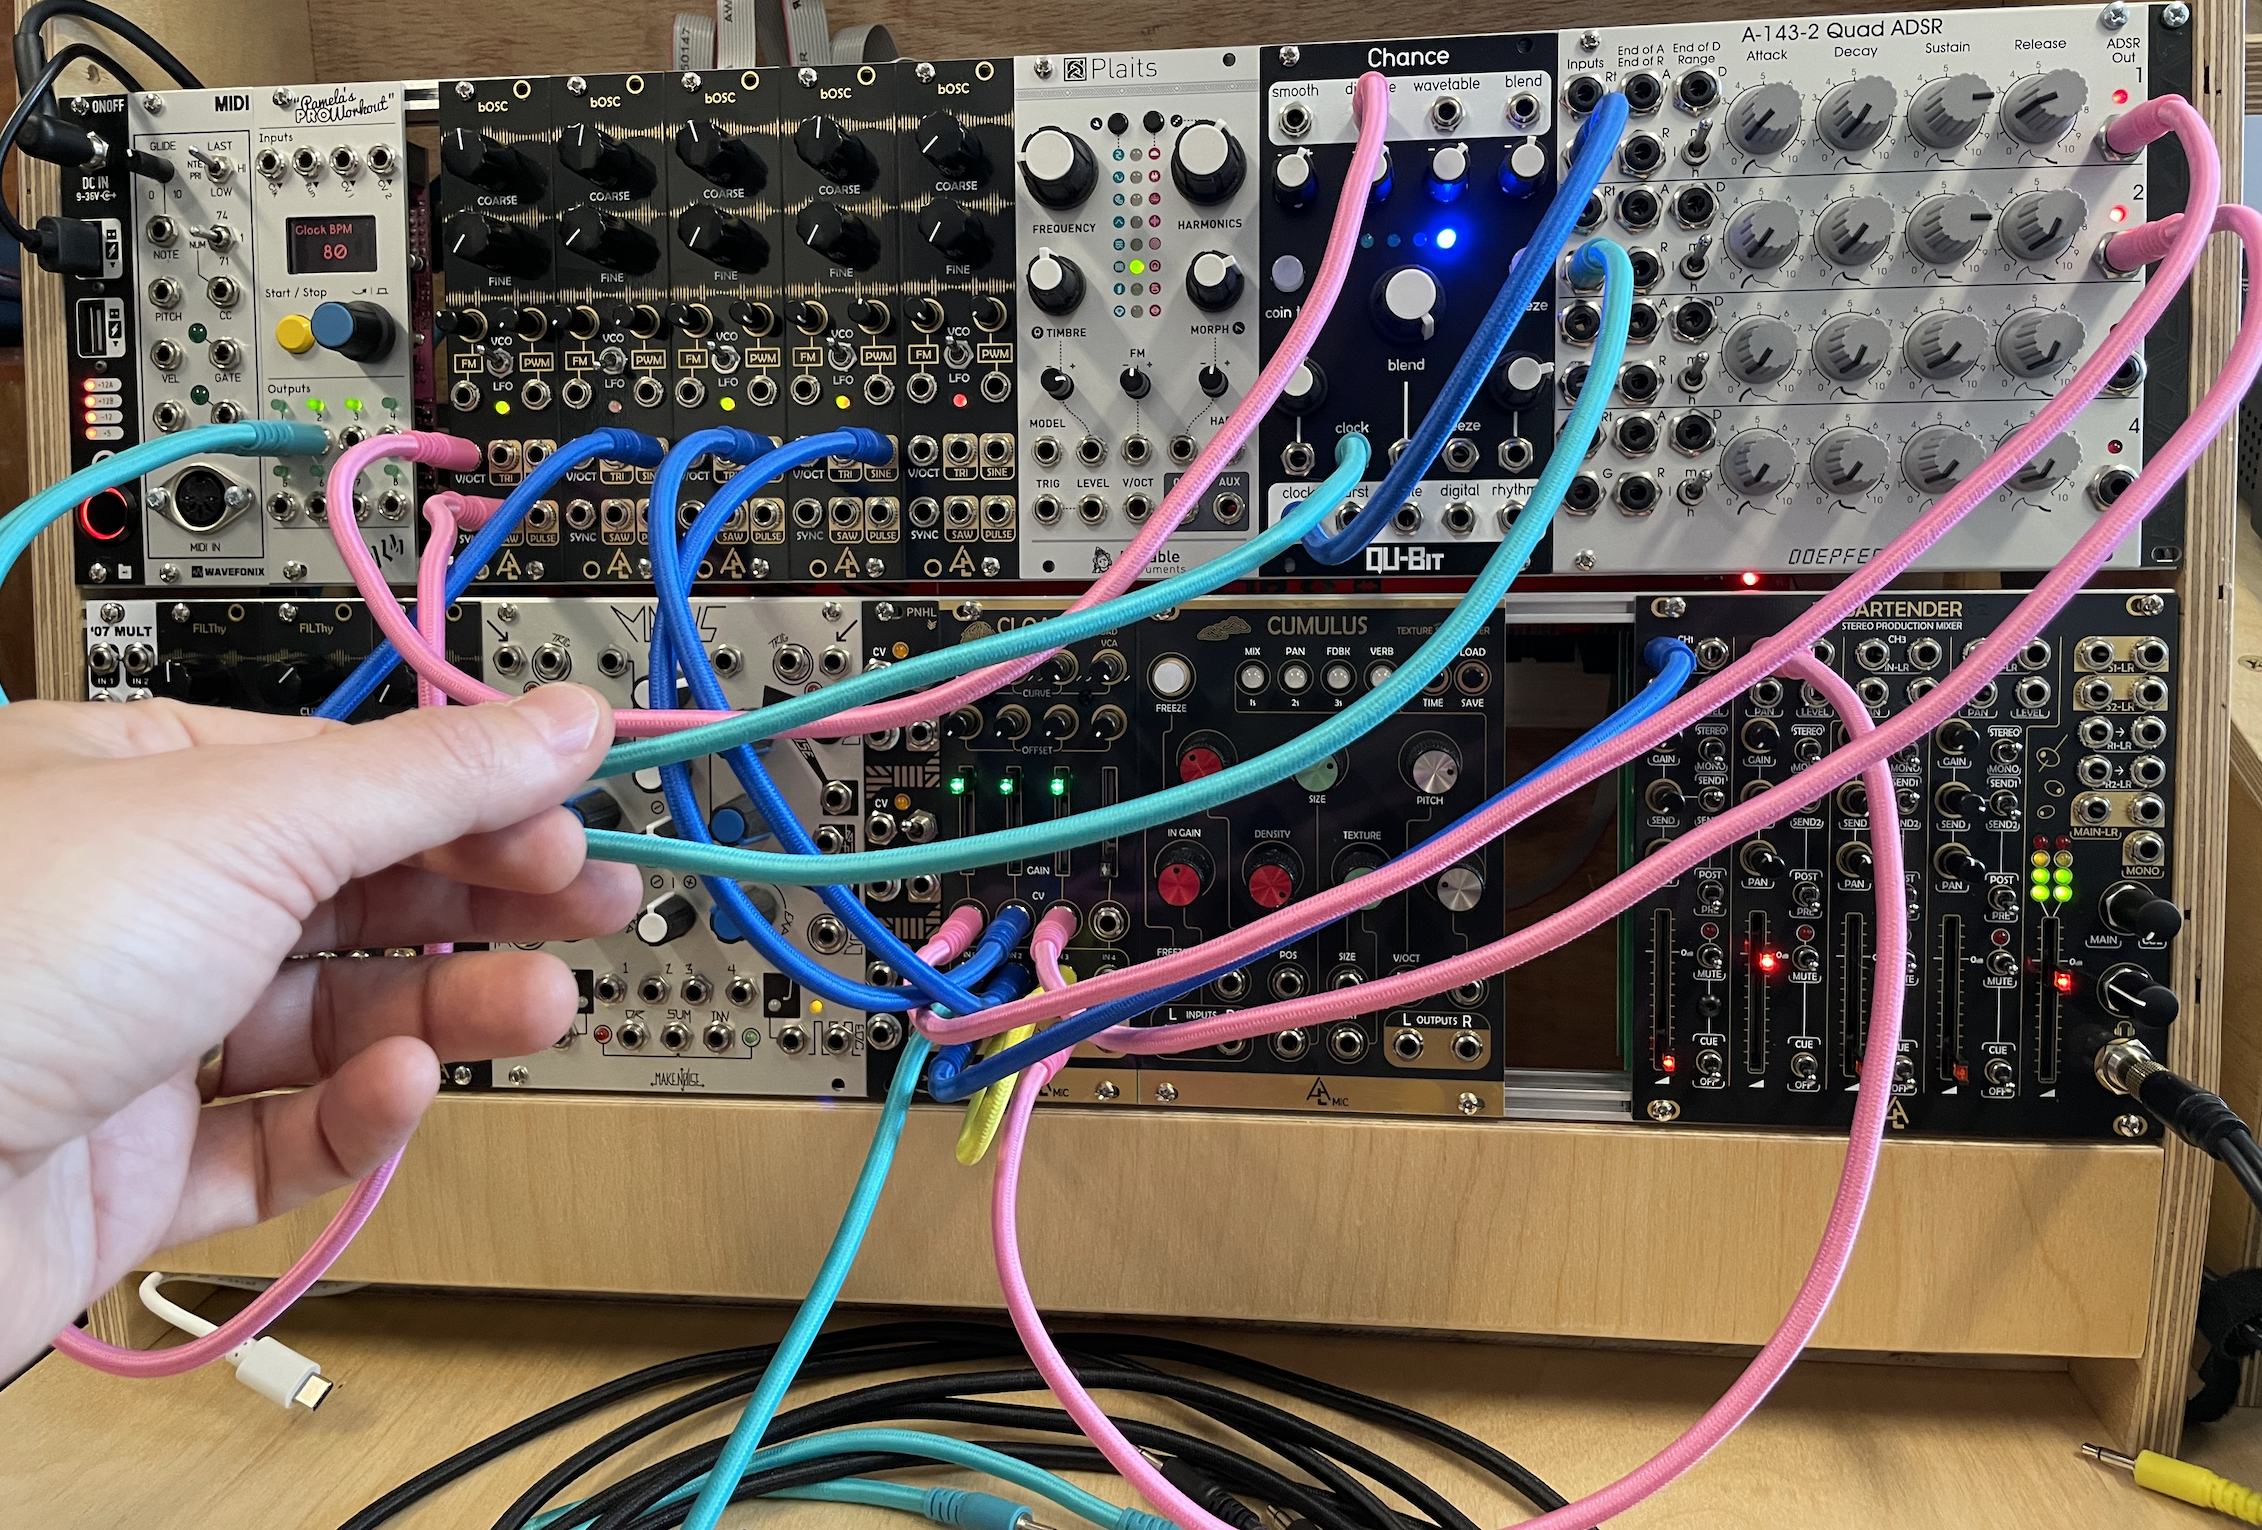
From here on, since the cables are starting to look cluttered, I will first show the connections for the current step, then I'll show picture with all the connections.
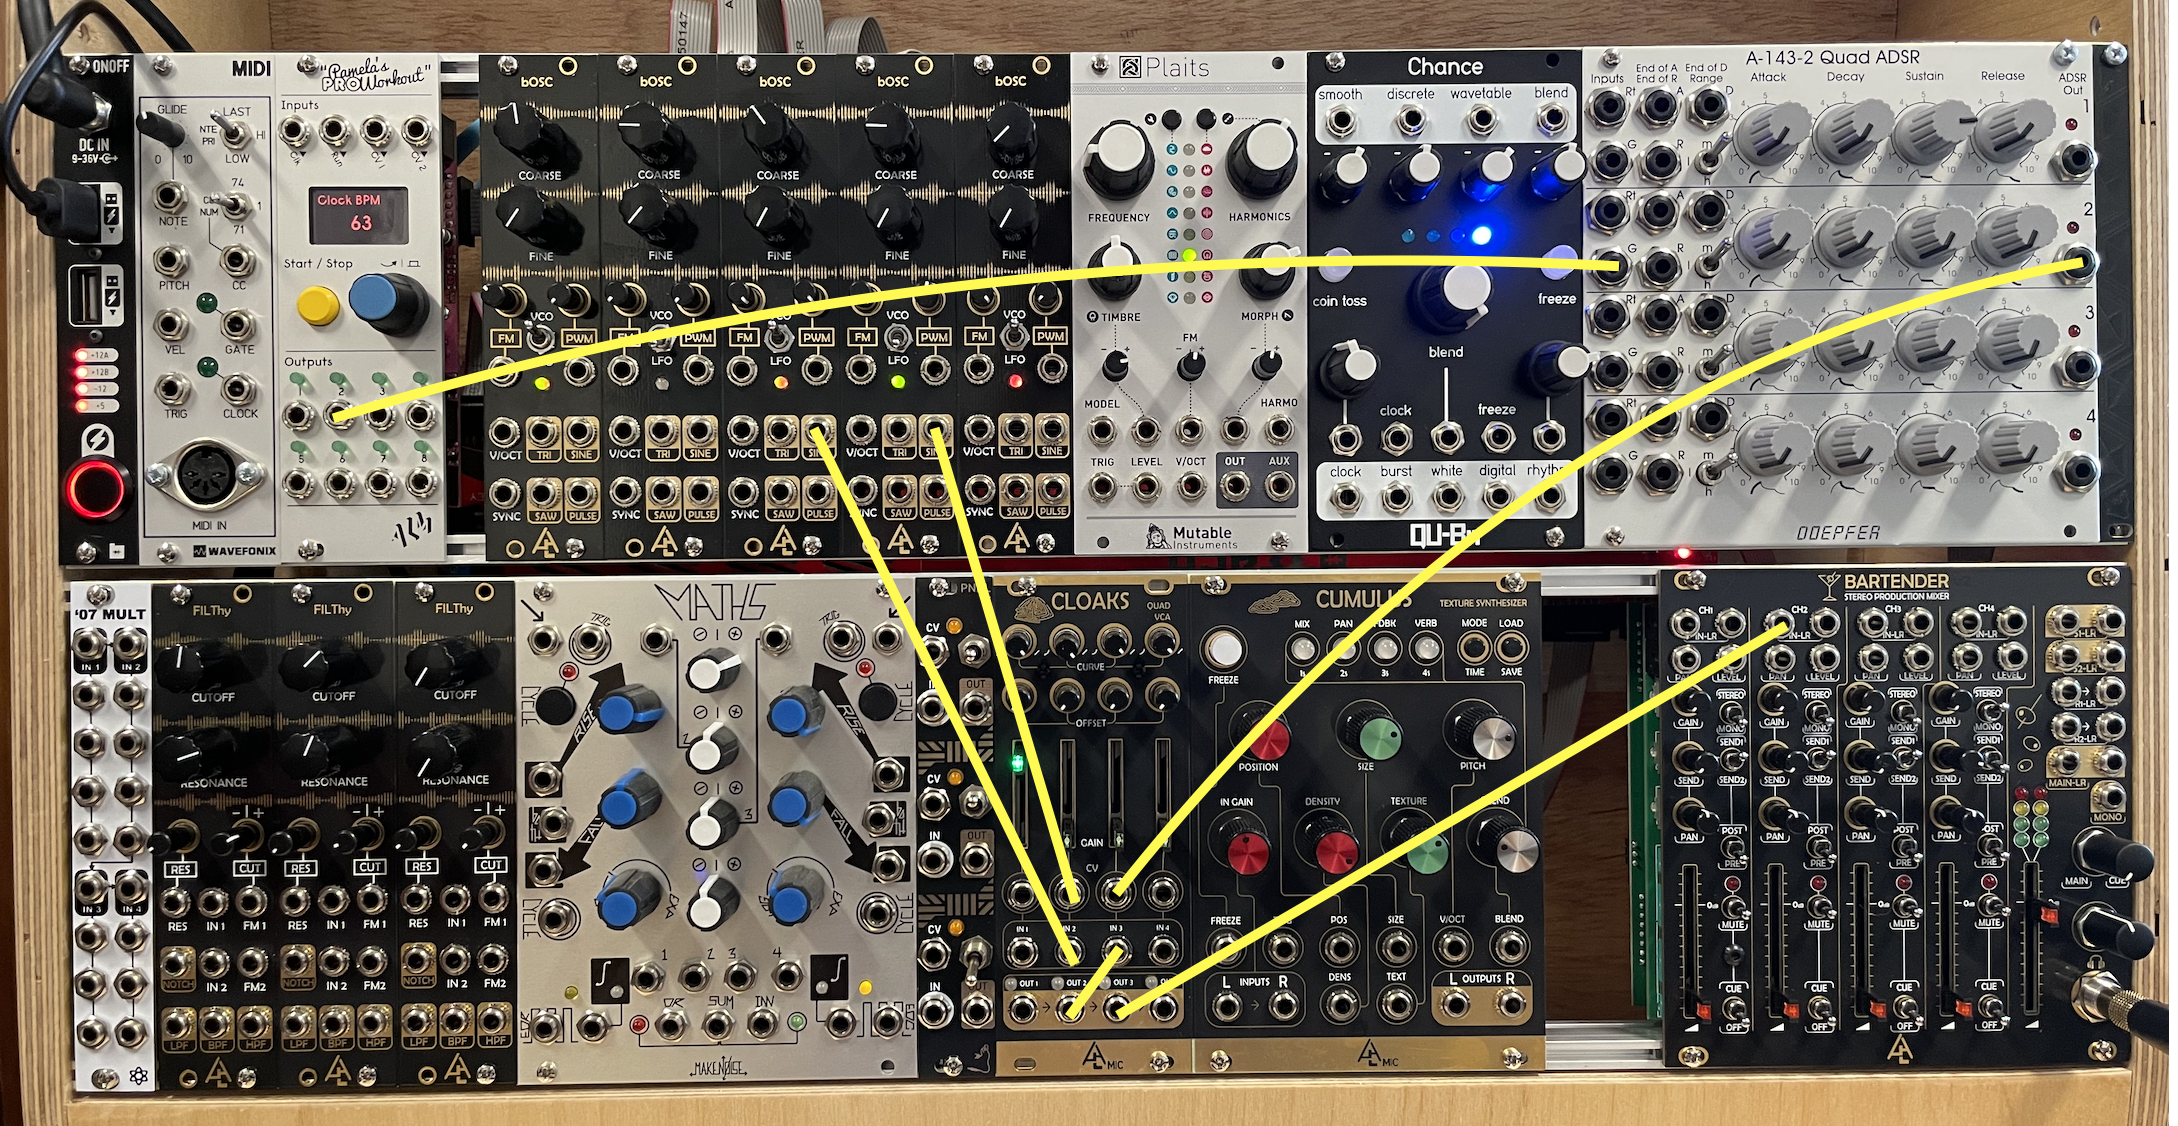
Connections for this step:
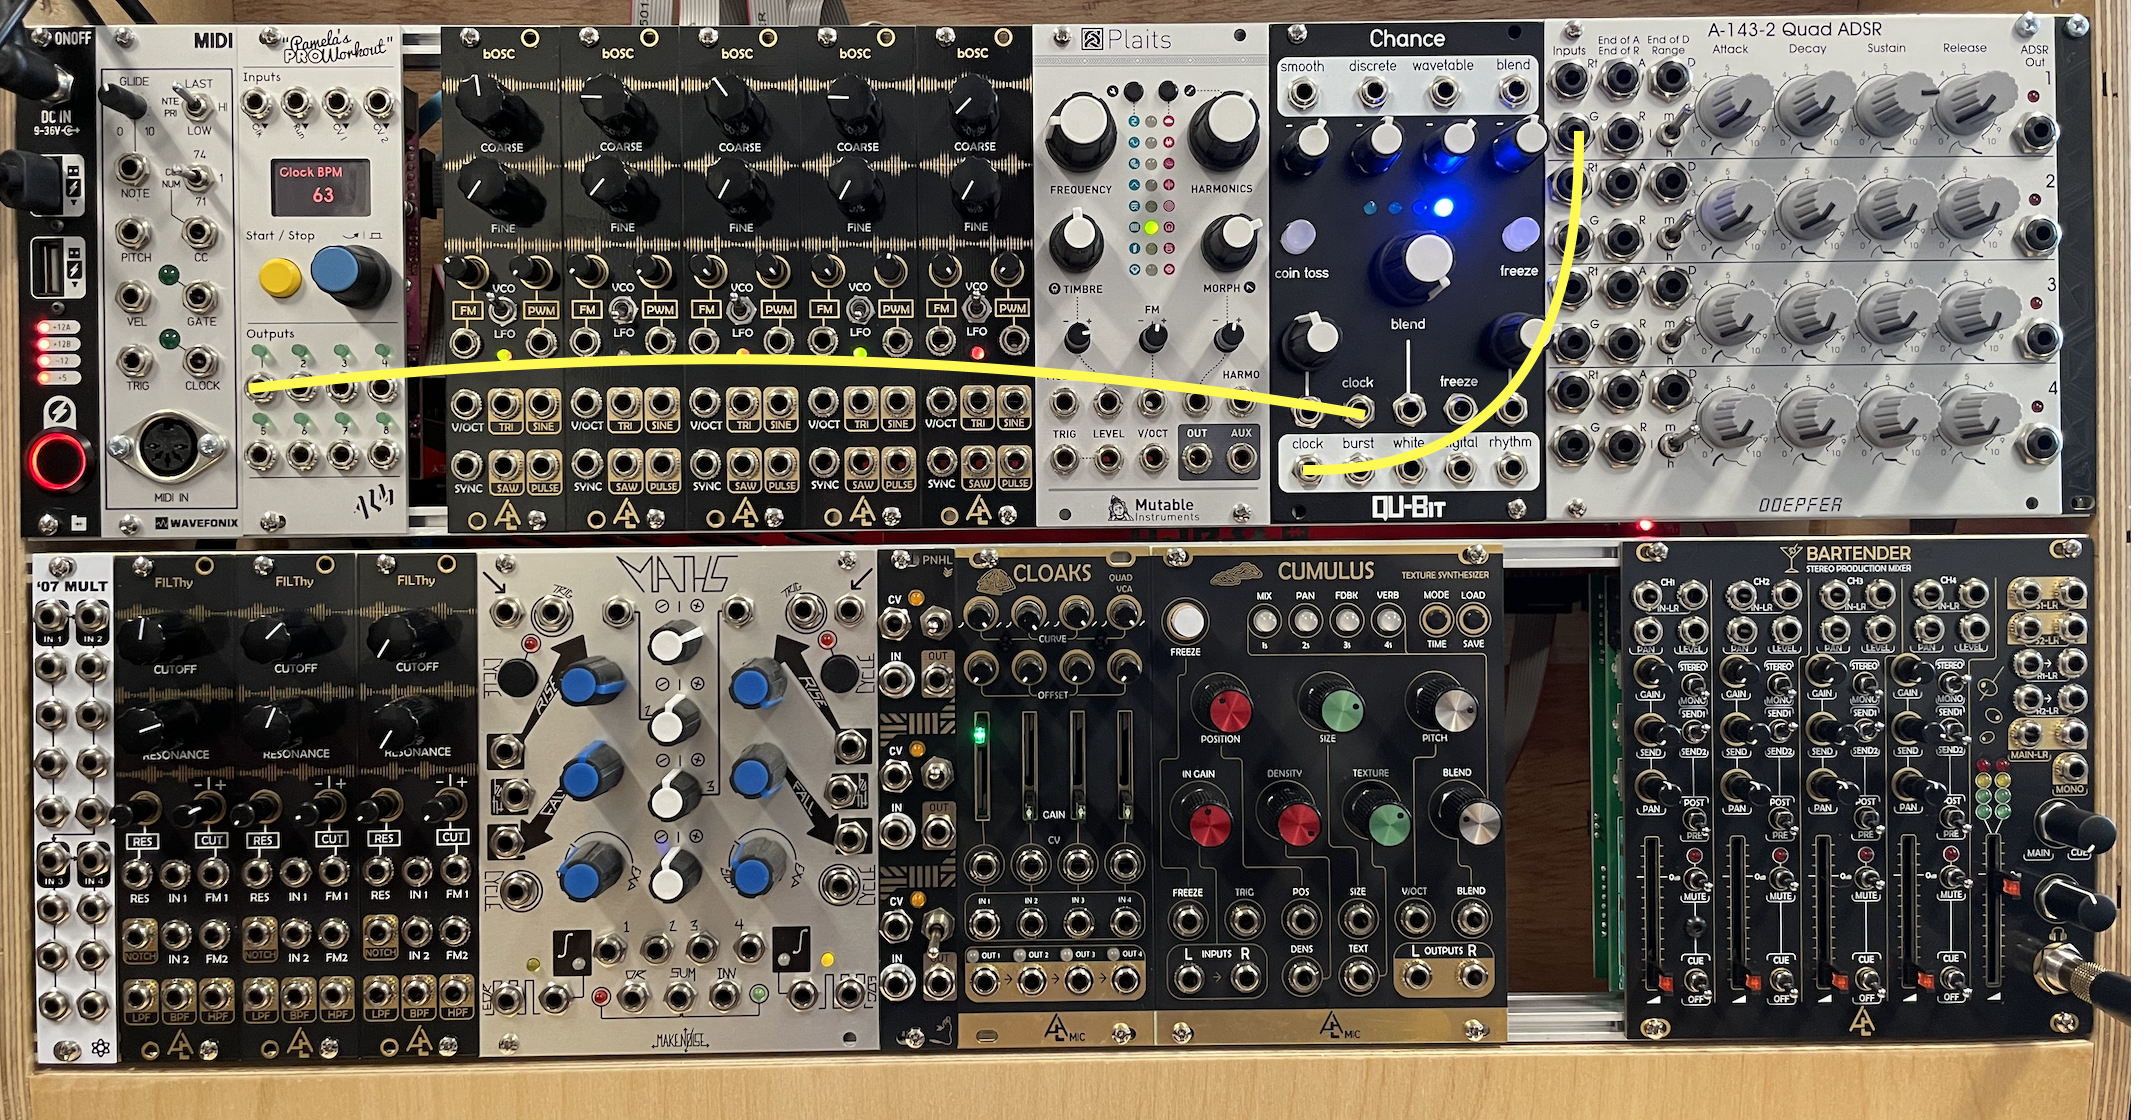
Complete connections:

12) Experiment with this patch by changing any knob you like (don't disconnect any cables yet).
13) Lower the fader of CH1 on the MIXER and let's start another patch.
Amplitude Modulation (AM Synthesis)
1) Connect the SINE output of the third bOSC oscillator (in VCO mode), to the IN2 of the CLOAKS VCA.
• Then connect the SINE output of the fourth bOSC (in VCO mode) to the CV2 of CLOAKS, and finally connect the OUT2 of CLOAKS to the IN2 of the MIXER; raise the CH2 fader on the MIXER. You should now hear sound, which is a form of Ring Modulation.
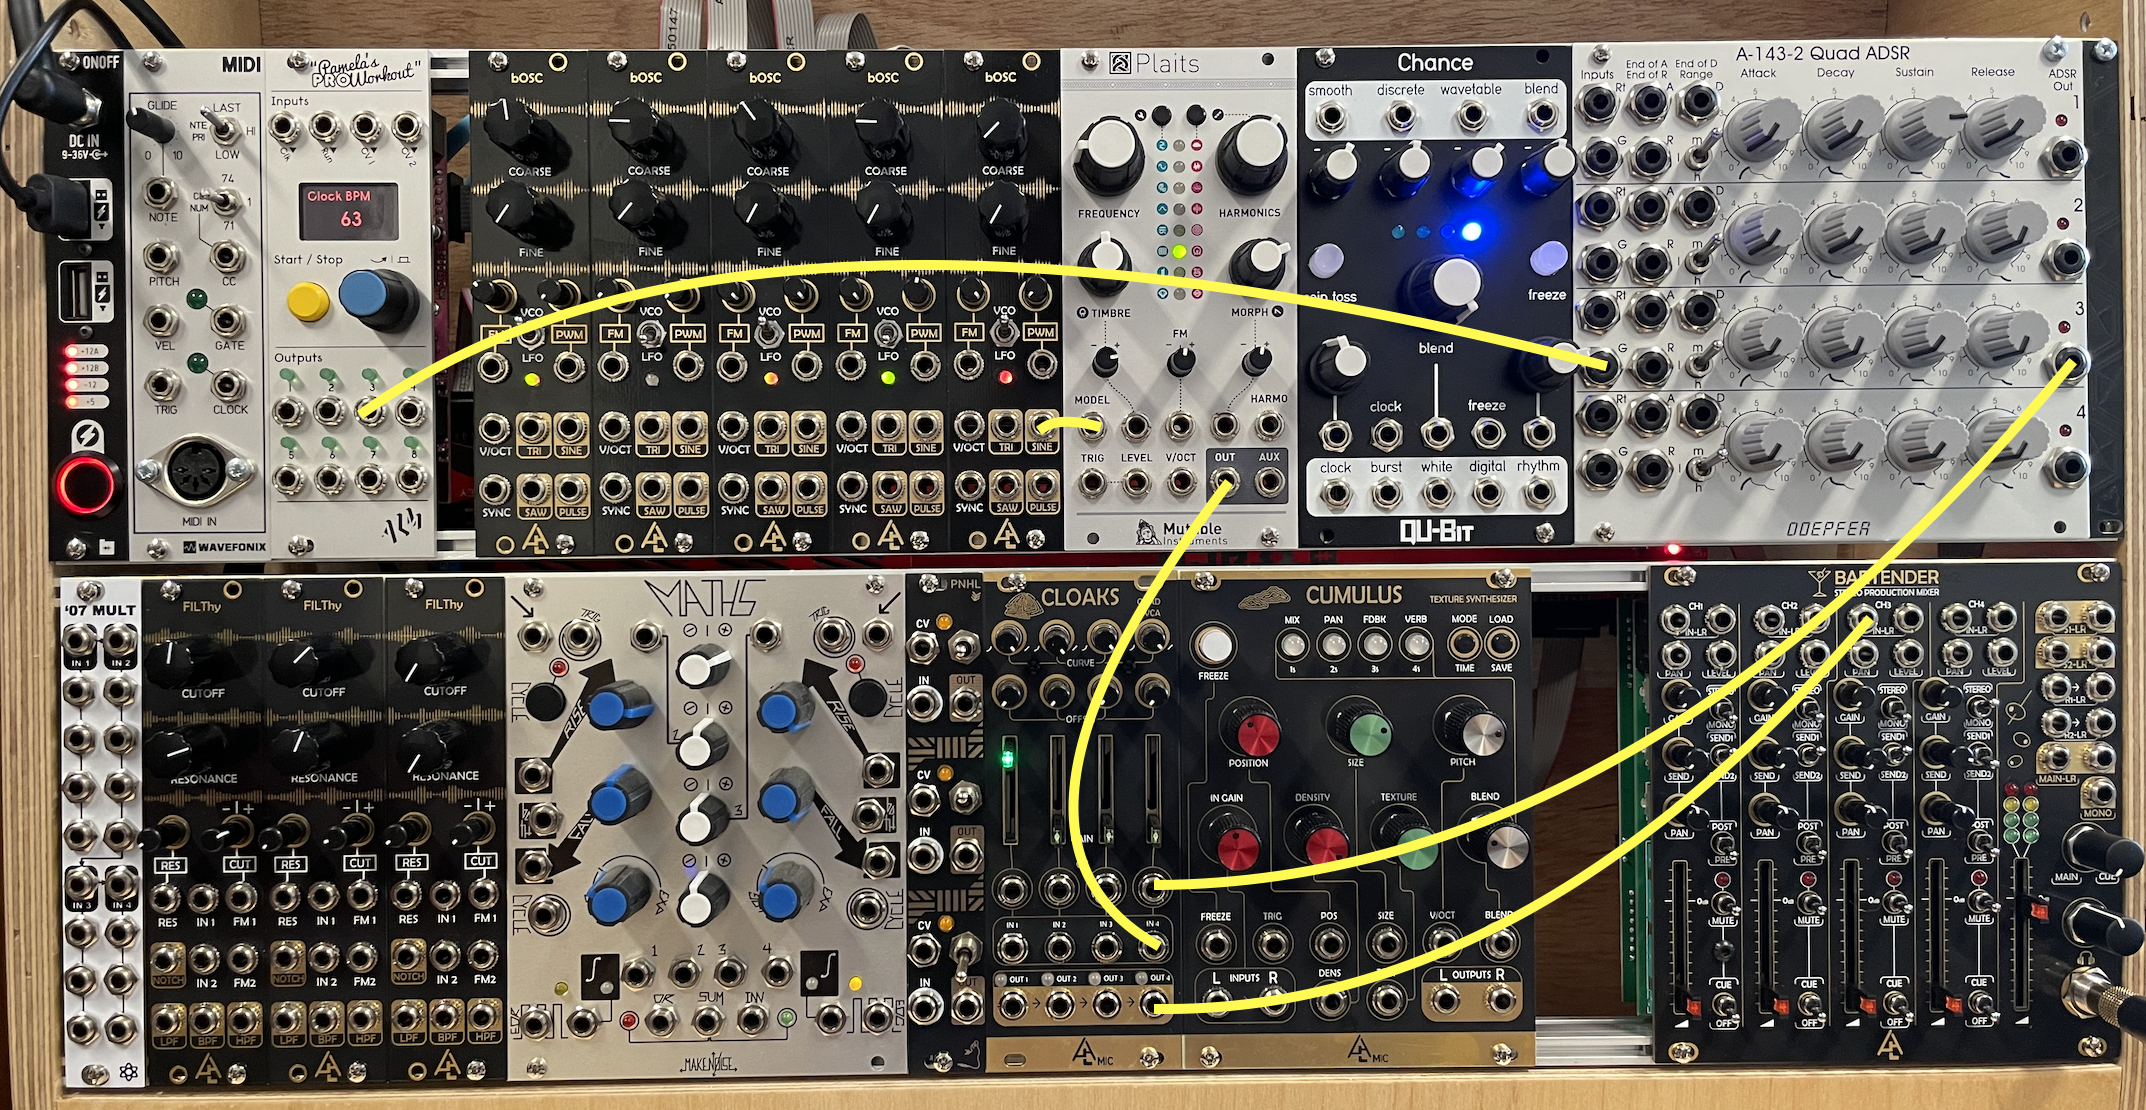
Connections for this step:
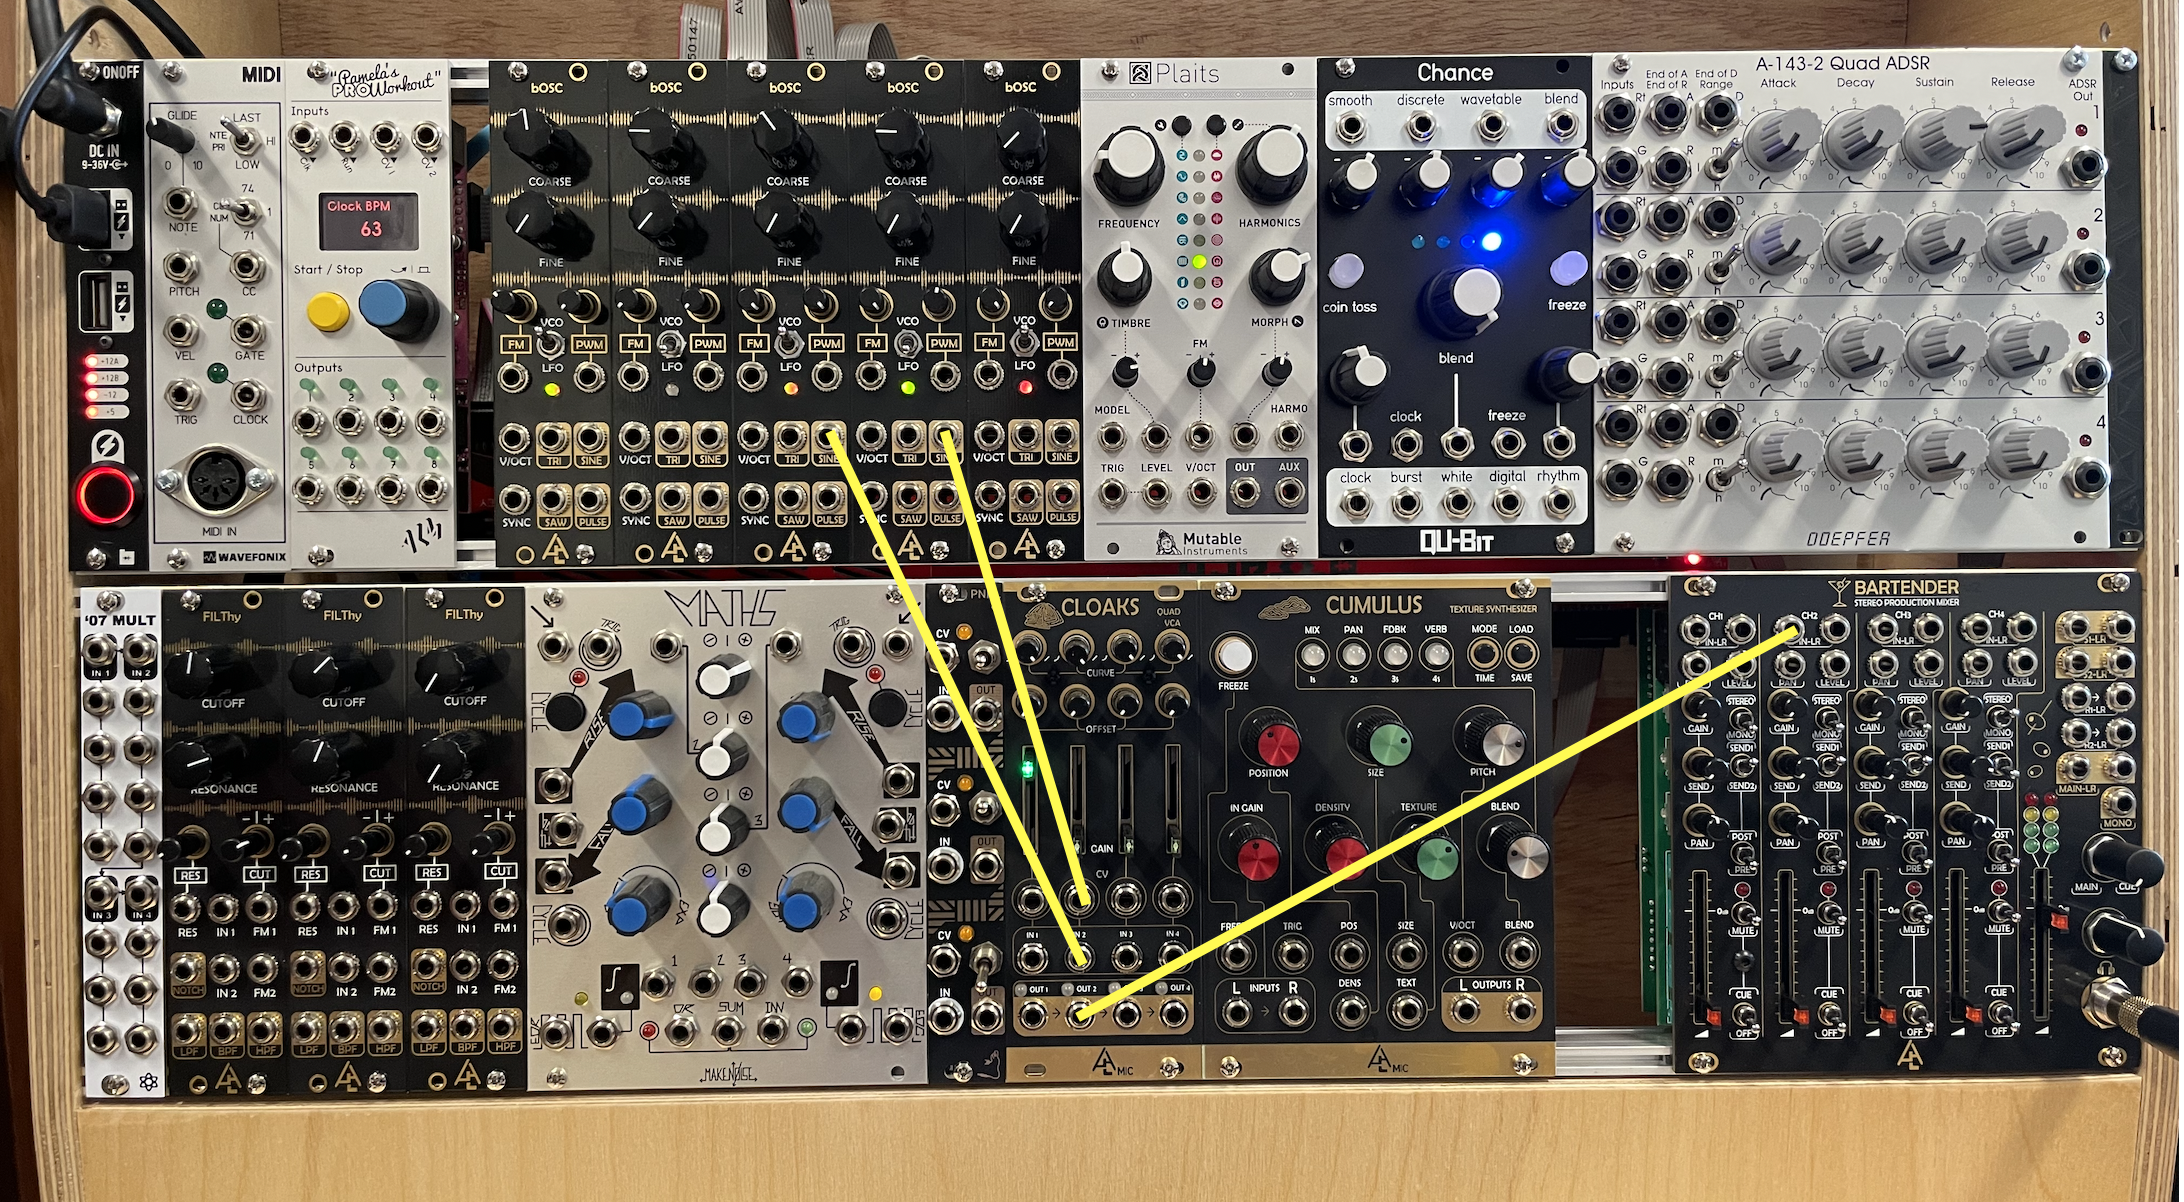
Complete connections:
• Experiment by changing the frequencies of both oscillators (change one at a time).
2) To create a pulse for this ring modulated sound, we will use, as with the first patch, a clock and an ADSR envelope.
• Connect the Output 2 of PAMs to the G2 on the ADSR, and connect the OUT2 of the ADSR to the CV3 of CLOAKS.
• Then disconnect IN2 of the mixer, and reconnect it to the IN3 of CLOAKS, and finally connect the OUT3 of CLOAKS to IN2 on the mixer.
• Raise the fader above the CV3 in CLOAKS. You will now hear 8th note pulses (note that I set PAMs to do this, but all outputs on PAMs can be changed to other divisions of the beat).
Connections for this step:
Complete connections:
3) Experiment with this patch by chaining any knob you like (don't disconnect any cables yet).
4) Lower the fader of CH2 on the MIXER and let's start another patch.
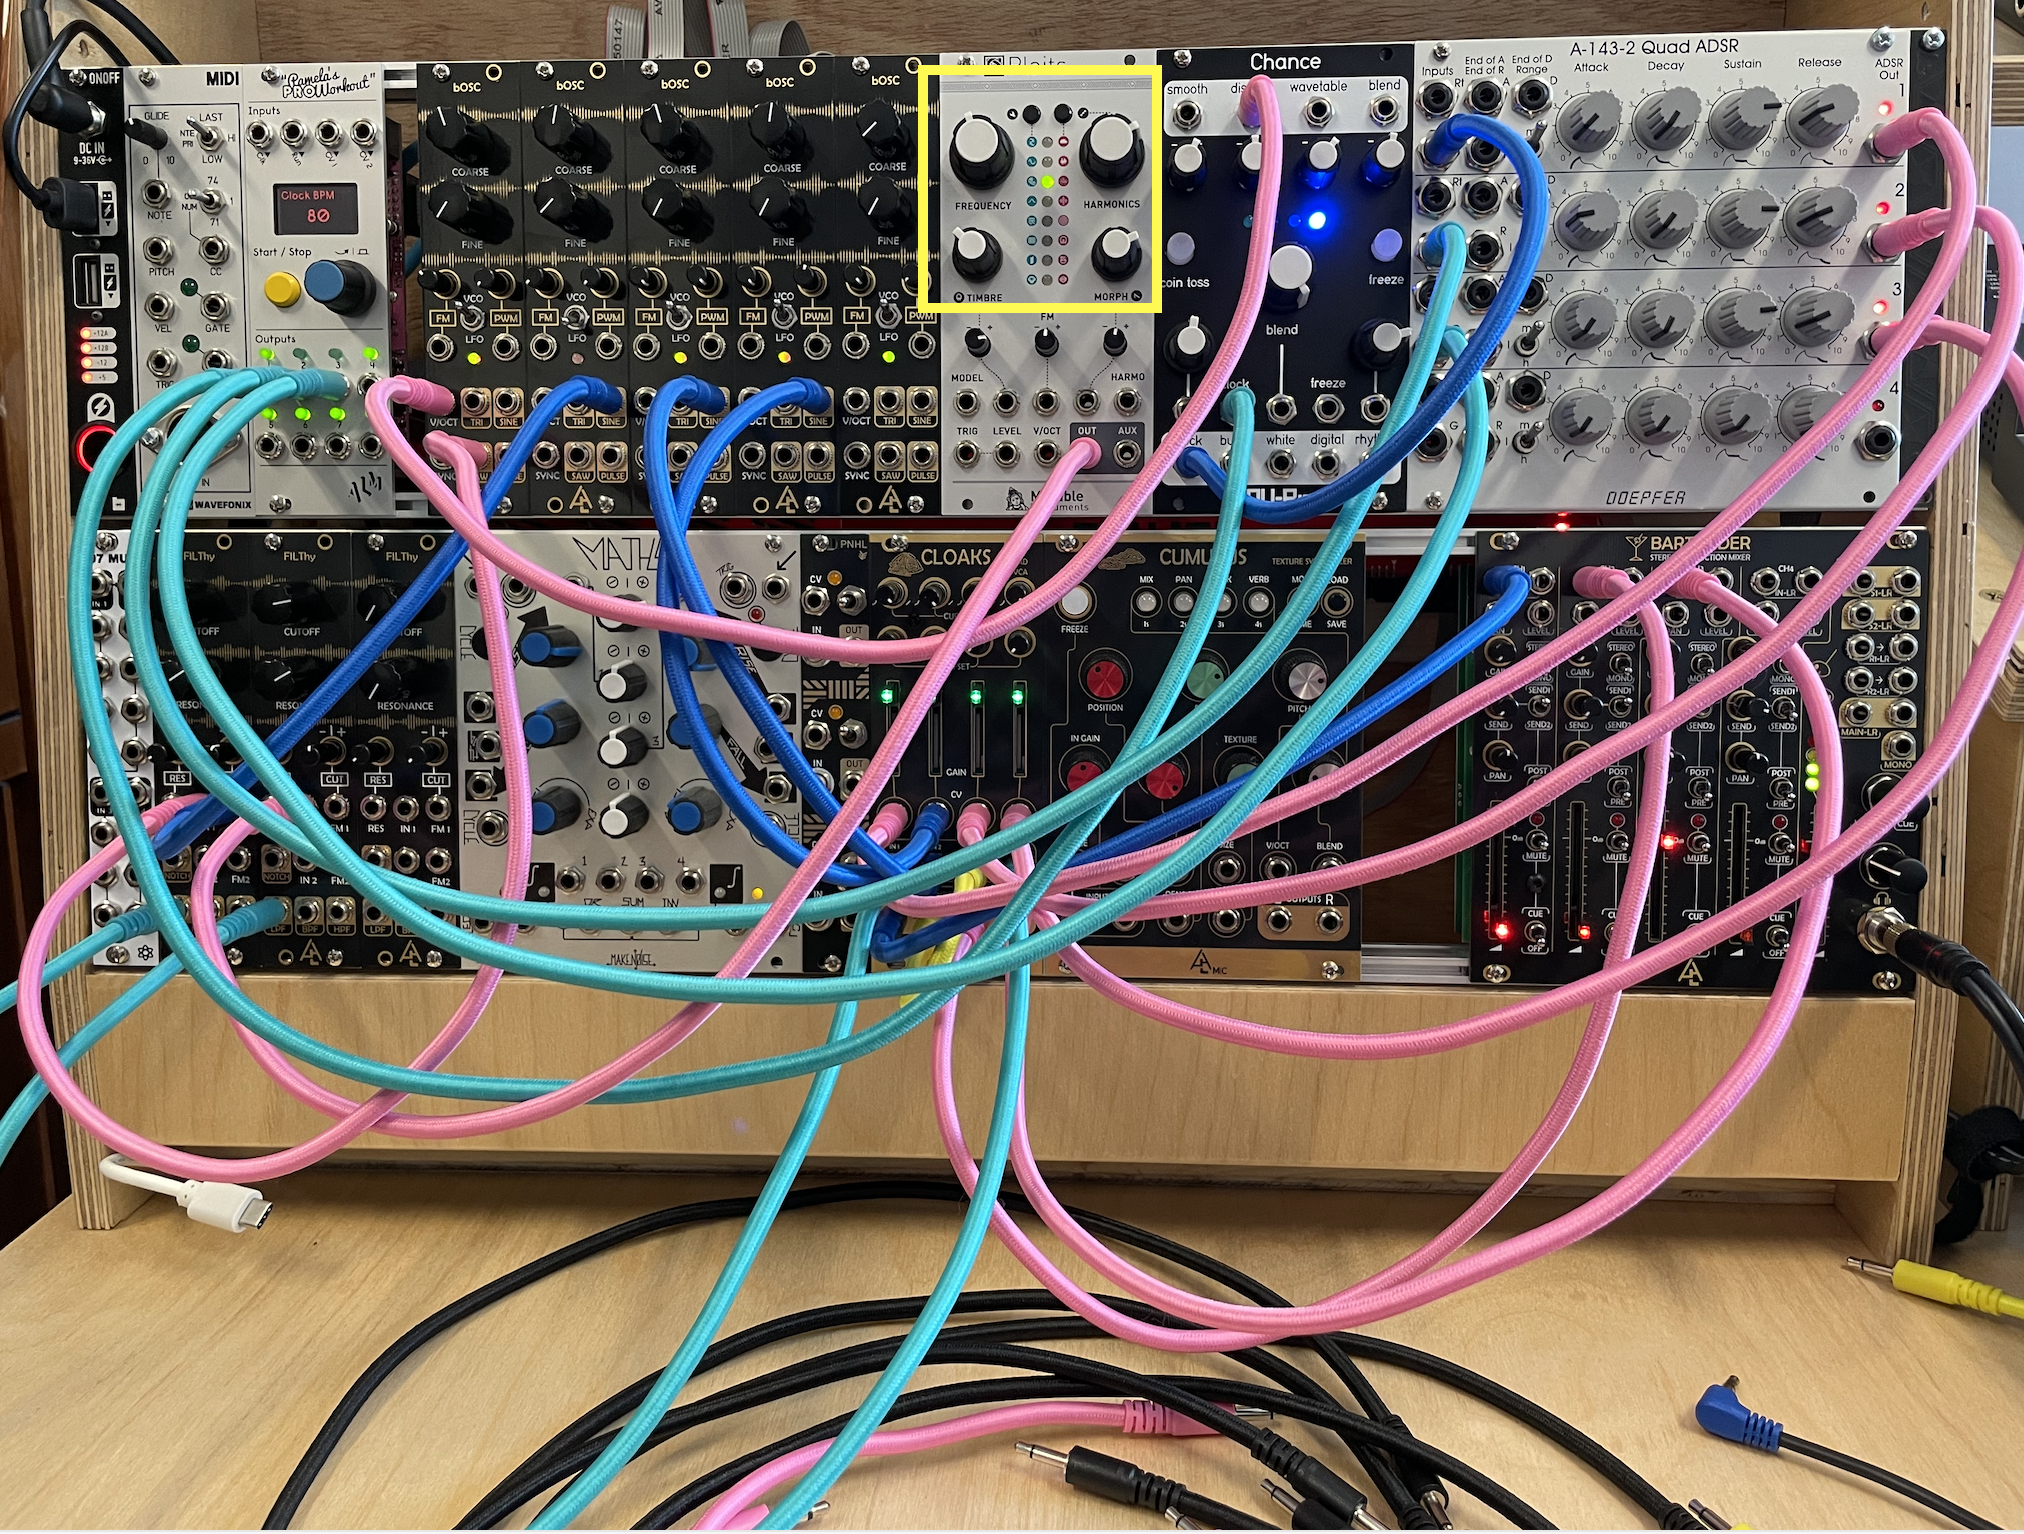
Complex Oscillator: Plaits
1) Connect the OUT of the PLAITS oscillator to the IN of a second FILThy filter and turn the CUTOFF knob fully to the right, then connect the LPF of the filter to the IN4 of CLOAKS.
• Connect the OUTPUT3 of PAMs to the G3 of the ADSR, and connect the OUT3 of the ADSR to the CV3 of CLOAKS. Finally, connect OUT3 of CLOAKS to CH3 of the MIXER, and raise the CH3 fader. You should now hear a 16th pulse with a complex waveform.
• Push the small buttons at the top of PLAITS to change the waveform type.
• Also, experiment with changing the FREQUENCY, HARMONICS, TIMBRE, and MORPH knob.
Connections for this step:
Complete connections:
2) Connect the fifth bOSC oscillator to MODEL input of PLAITS
Q8: What does this do?
3) Experiment with modulation and try to connect the fifth bOSC to any of the other inputs on PLAITS, OR to the FM1 of the second FILThy filter.
Experimentation
• MUTE THE APOLLO (press the MONITOR knob, it will turn red). VERY IMPORTANT!! You will get feedback if you don't do this.
• Then, open Logic on the iMac, create a track with INPUT 7-8, and click record enable.
• Hit record.
• Experiment by changing anything on the above three patches (including cables). Remember that you can play all three patches on the same time be raising the first three faders on the modular synth's MIXER. This is an instrument, meant to be played; turn those knobs!
• As a challenge, try tuning the three sound sources to one another.
• Again, please only change the tempo in PAMs, nothing else.
• Have fun, and do not fear mistakes.
Finally…
• Save your Logic project.
• Turn down the faders on the YAMAHA mixer.
• Turn down the headphone volume on the modular.
• Remove all patch cables and place them on the table in front of the modular.